Flash OS to Pi And Setup Internet
NOTE! I am referencing the Pi Zero in this video, but it is the exact same procedure and recommendations for the bigger Raspberry Pi 3s and 4s.
The only difference for Pi 4s is that the HDMI port is micro HDMI, whereas on the Pi Zero it is mini HDMI.
This is only needed if you need a backup plan and are unable to setup the internet via the headless mode described in the video (plugging the HDMI into the Pi and a monitor gives you direct access to the Pi without it already needing to be connected to the internet).
You’ll need an SD card reader and at least a 16GB micro SD card (this is supplied in your drone kit). Plug the Micro SD card into the USB reader, and follow the video for the remaining instructions.
RESOURCES
Example of the wpa_supplicant.conf file for headless internet
Lookup your country code if you are non-USA by googling ISO/IEC alpha2 country codes
# Giving configuration update rights to wpa_cli
ctrl_interface=/run/wpa_supplicant
update_config=1

# AP scanning
ap_scan=1

# ISO/IEC alpha2 country code in which the device is operating
country=US

# network section generated by wpa_passphrase
network={
    ssid="MYSSID"
    psk="YOUR_PASSWORD"
}
STEPS TO TAKE IF HEADLESS INTERNET INSTALL DOESN’T WORK
- Plug HDMI into your pi and a monitor
- Plug keyboard into your pi
- login with pi/raspberry (username/password)
- type “sudo raspi-config”

- System Options > Wireless LAN >
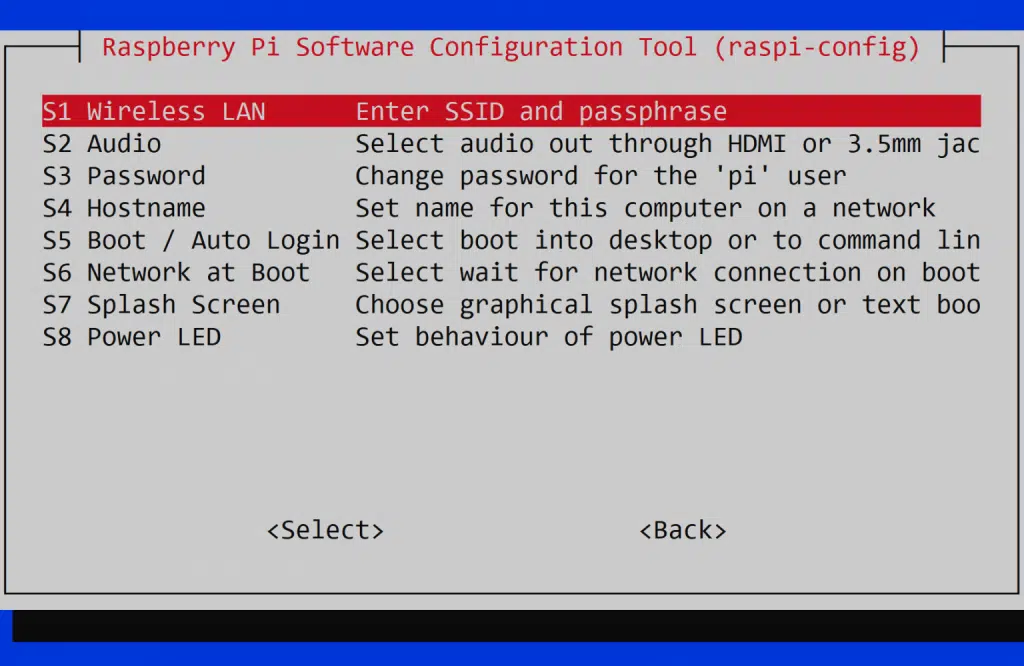
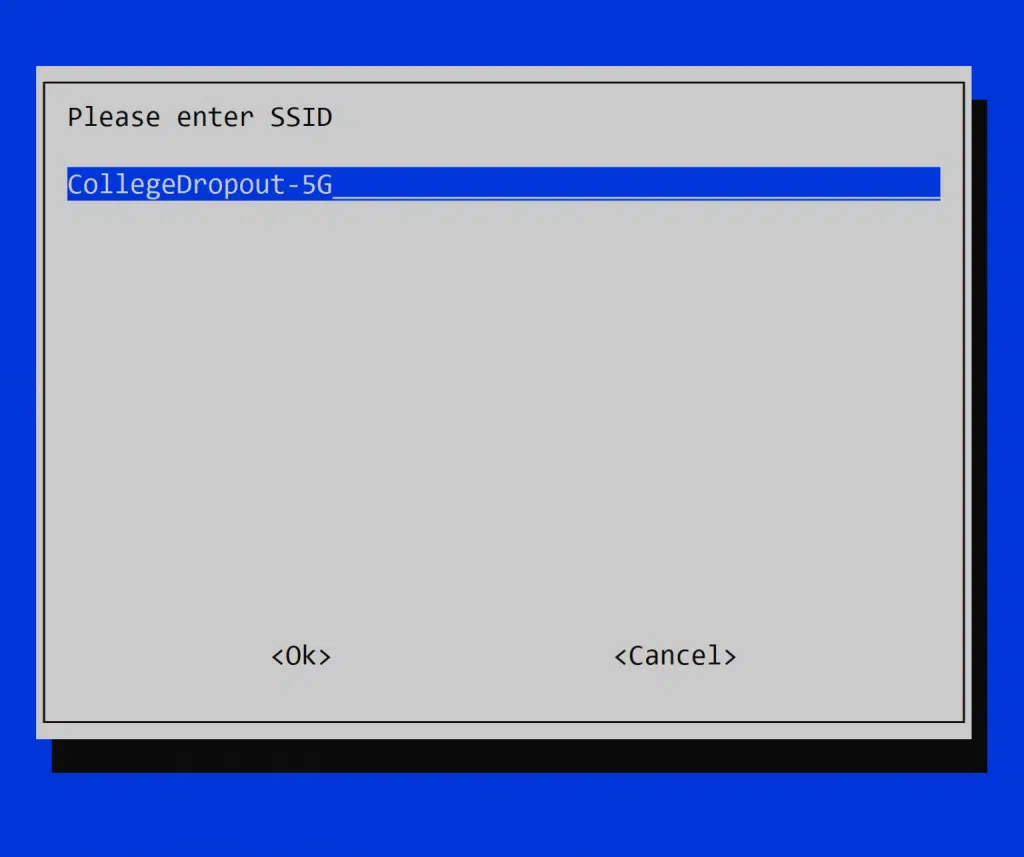
Enter the name of the WiFi network you want to access. You will need assistance from a camp instructor to know which network to access.
Hit Enter once the SSID is entered.
- Next, enter the password for the wifi.
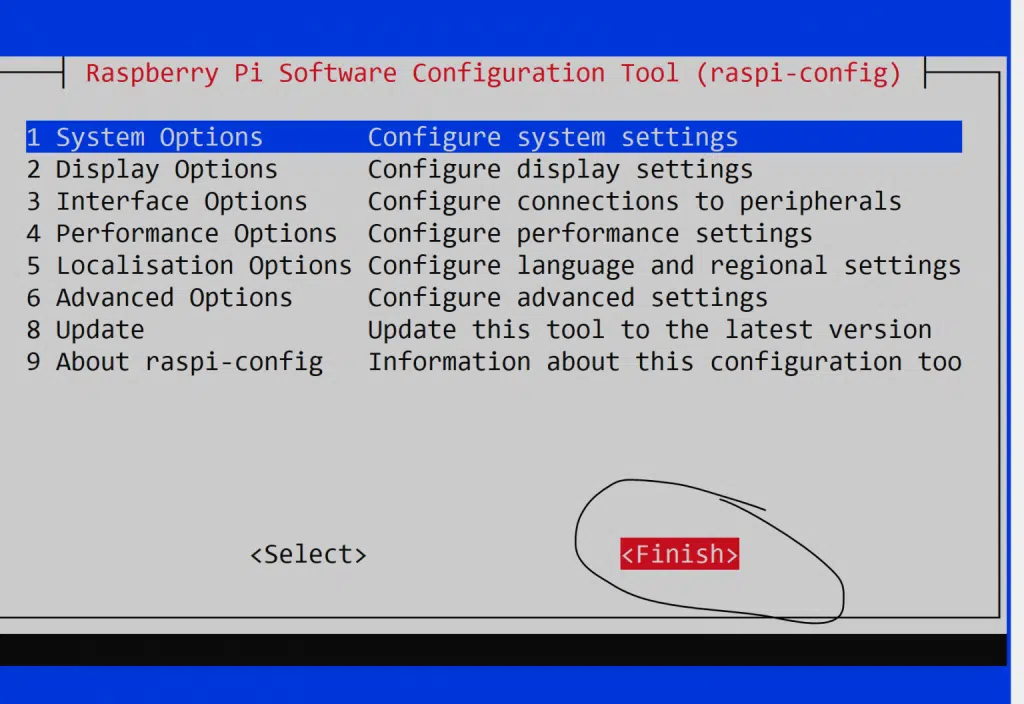
- Next, arrow over to “FINISH” and hit enter
- Next, we need to activate SSH. So type “sudo raspi-config” again and hit enter
- Go to Interface Options
- Go to SSH, and move the arrow keys to activate SSH
- Now type “sudo reboot” to allow the WiFi configuration to activate
- Now log back in once the Pi has booted back up (allow 1 minute)
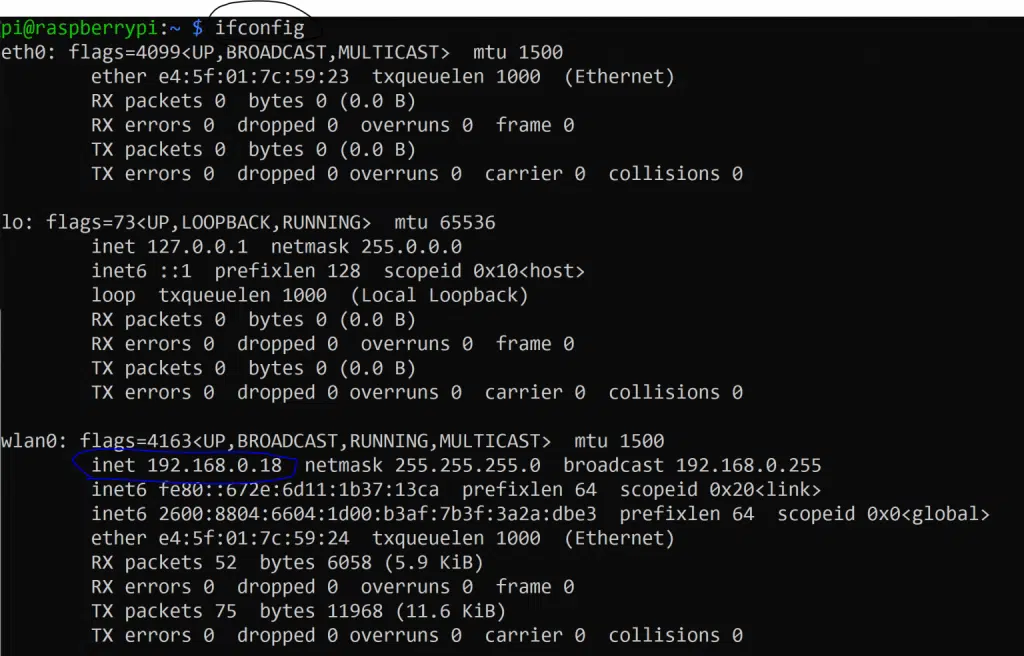
- Type ifconfig and look for wlan0
If you have an IP address by wlan0, then your pi is now on the internet!
Make note of the IP address under wlan0, you can use it to remotely SSH into your Pi without the HDMI cable.
For example, my IP address is 192.168.0.18