
Logging Into the Pi Remotely
1. Remotely Logging Into Your Pi From Your Computer
Now with your Micro SD plugged into your Pi. It’s time to power it up. Plug your USB-C into the power port of the Pi, and power it up.
You may have noticed that the Pi is a mini computer, but where is the screen? Where is the keyboard and mouse? Well eventually, we will be using our desktop/laptop computer to remotely access the pi.
In the previous step, you should have set up your internet on the Pi, and the Pi should automatically connect to your internet. How do we determine if it is online? We need to see if the Pi has an IP address. Make sure your computer and raspberry pi are configured to be on the same WiFi network.
Download a program called “Advanced IP Scanner” and run it.
On your Windows computer, type “cmd” into the search bar, and open a command prompt.
In the command prompt, type “ipconfig” and hit enter.
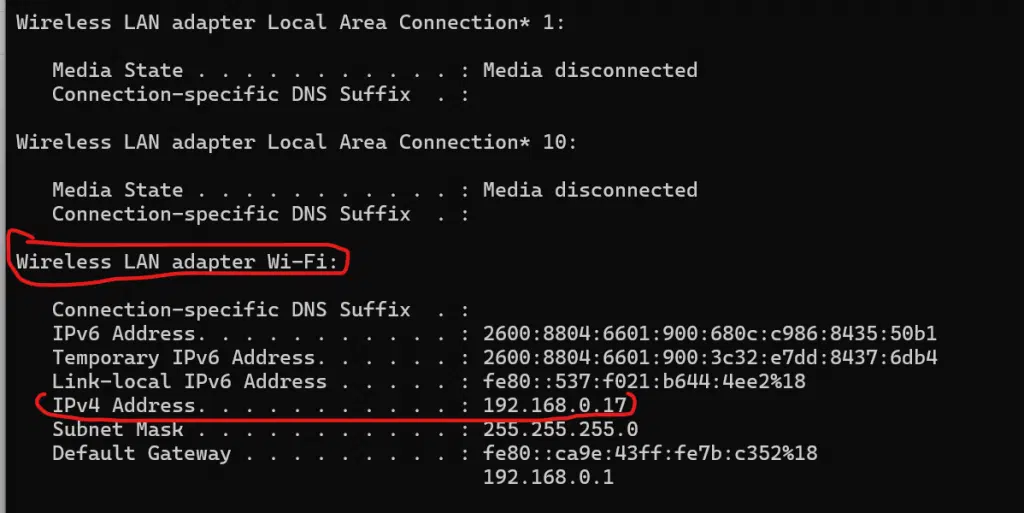
Here, you are looking for the device that says “Wireless LAN adapter Wi-Fi”. We are trying to determine what network our router is on. In the example above, the IP address of my desktop is 192.168.0.17
From here, in 99.9% of cases, your network you are on is the first three numbers in the IP address. So 192.168.0
For example, if my IP address from cmd was 192.168.1.41, I would isolate the 192.168.1 subnet for searching purposes.
Now open up Advanced IP Scanner, and type in the entire network into the search bar. For example, I know my subnet is 192.168.0
So I need to search all devices from 1-254.
So I would input this into Advanced IP Scanner and hit the scan button. 192.168.0.1-192.168.0.254
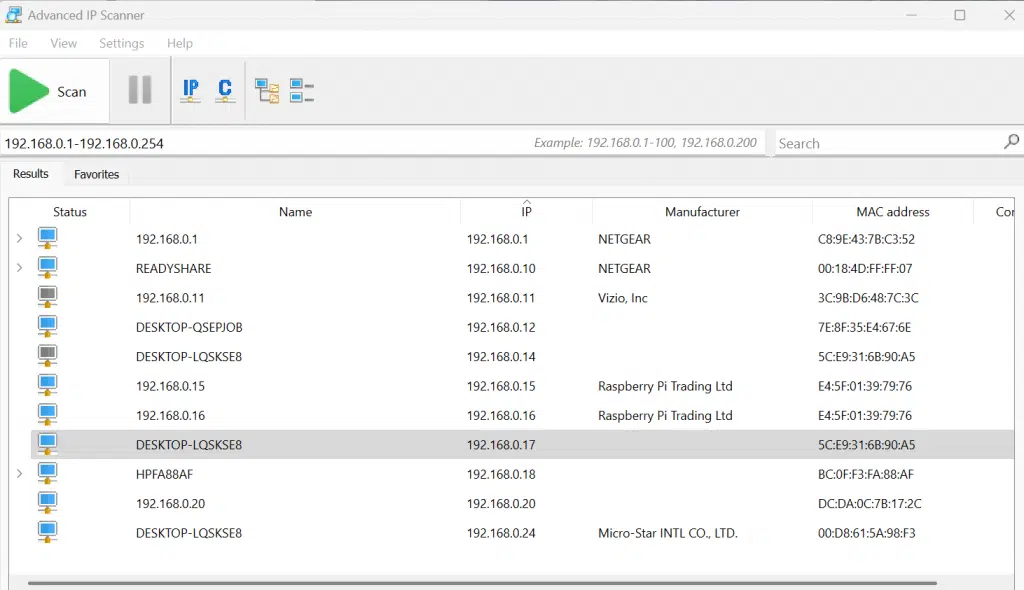
This will search for all devices connected on the WiFi network. We are looking for our Raspberry Pi IP address. In 80% of the cases, it will be clear what device is the raspberry pi, because there will be a “Raspberry Pi Trading Ltd” on the manufacturer column.
Occasionally, you won’t see this on any of the scanned devices. In these cases, you need to test logging into each IP address on the network. For example, 192.168.0.20, would be an IP address I would investigate as being the raspberry pi if no devices were found with the Raspberry Pi Trading Ltd label.
Now, once you know your IP address of the Pi, or you have an IP address you want to test logging into, it’s time to remotely access your pi.
Open up another command prompt.
Type “ssh pi@192.168.0.16” and hit enter. This “pi” is the username we set up during the flash, and the “192.168.0.16” is the IP address of our pi.
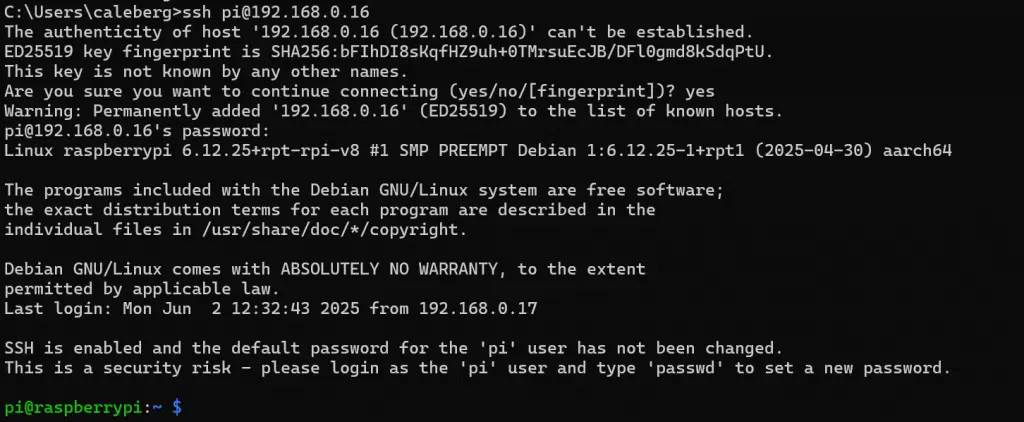
You may have to type “yes” and hit enter if prompted with “are you sure you want to continue connecting.
If you were successful, you should now be logged onto your Raspberry Pi remotely!
If you’re struggling to connect to your Pi remotely, do not fear- occasionally, setting up the WiFi upon flashing of the Pi image can fail. There is a way around this, and I will show you this method below. NOTE! You only need to follow along with the section below if you weren’t able to connect to your Pi.
2. Logging Into Your Pi Directly (Without IP Address)
If you are struggling to log into your Pi’s internet at this point, it may be because the flashing process failed to associate your Pi with your Wifi. We can do this manually.
In this direct method, we hook up all the things you would hook up to a computer, but now on the pi.
So, hook up an HDMI cord to your Pi from your monitor to your Pi. You may need a micro HDMI or mini HDMI converter to plug into your HDMI cable.
If you’re following along with a PiHawk kit, you’d need a micro HDMI to HDMI converter
Next, you need to plug in your keyboard to one of the USB ports of your Pi.
Finally, power up the pi. You should see the Pi loading screen start spitting text all over the place. At the end, it should prompt you for your username and password. Enter “pi” and “raspberry” or whatever you set up during the flashing process.
Once logged in, type “ifconfig” and hit enter. See if your wlan0 device has an IP address or not. If it does, you can use that to remotely ssh into.
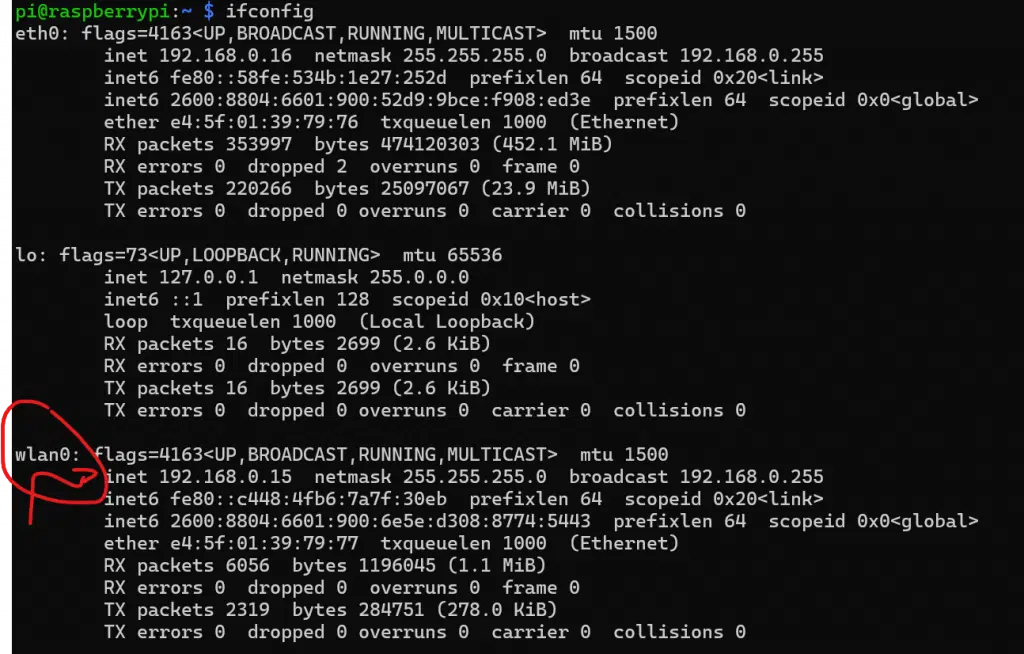
If it does not have an IP address, we need to set it up.
Type “sudo raspi-config” into the terminal and hit enter.
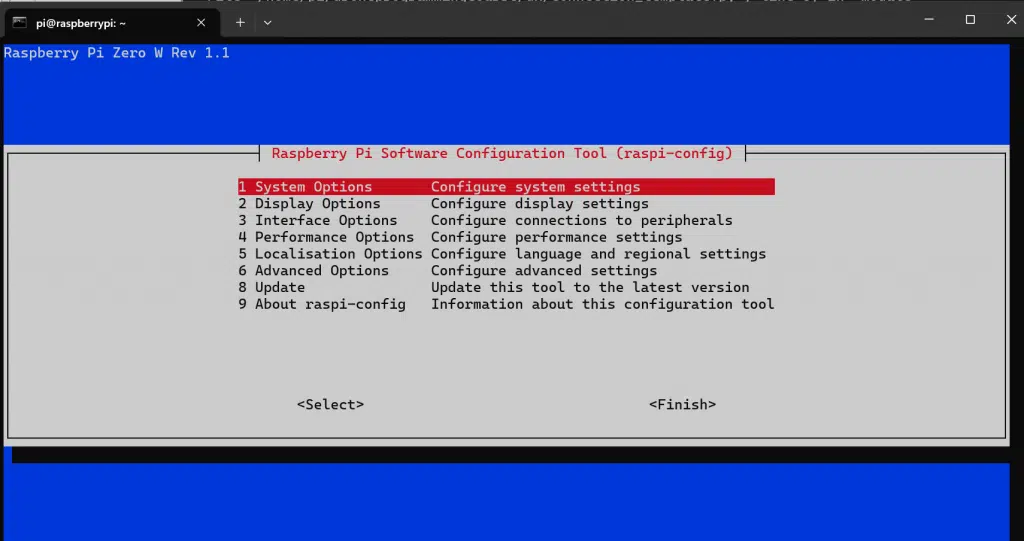
Hit enter to go into System Options, then again to go into Wireless LAN
Type the SSID of your WiFi you want to connect to:
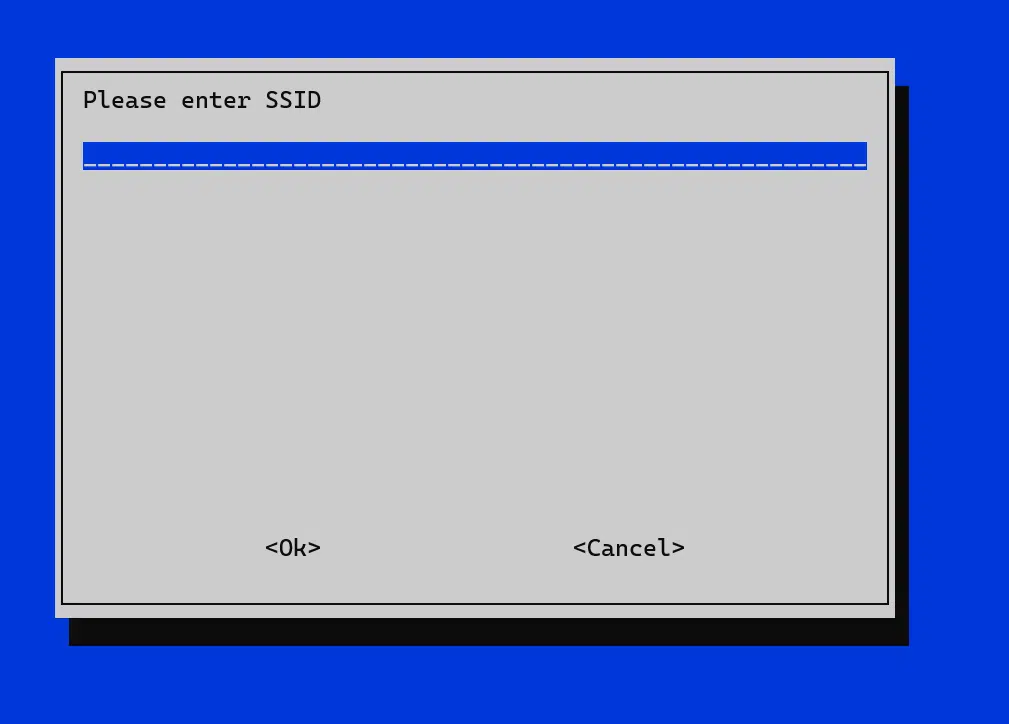
And hit enter. Then type in the password.
After this, arrow over to FINISH. You may need to reboot the pi for this change to take effect, so in the terminal type “sudo reboot” and hit enter.
When it comes back, determine if your wlan0 (wireless device) has an IP address by typing “ipconfig” and hitting enter. If you see a IP address under you wlan0 device, youre on the internet and can now remotely log into the Pi. You could now use method 1 from this lecture with your new IP address.