


How To Make A DIY 4G Drone For BVLOS Control
One big limitation of conventional drones is the radius of control. Both telemetry and RC based control are limited to a few miles, which is fine if the mission requires a pilot to be within visual line of sight. For beyond visual line of sight missions (BVLOS), conventional methods of drone control just won’t do. We need a method to control the drone regardless of our proximity to it. To accomplish this, we can equip our drone with 4G LTE to gain BVLOS control. In this article, we’ll walk you through how to make your own 4G drone, and even how to control it from hundreds of miles away.
If you prefer video form, we have this article in video below. It is long, but has the sections bookmarked so you can easily click on what you need. I’ll be referencing this video quite a bit, because some explanations are just easier to follow in video form.
The research conducted in this article was conducted on our PiHawk drone kits, which as you will see are easily able to upgrade into 4G drones. The prerequisite to following along with this article is to have a flyable raspberry pi drone running ArduPilot or PX4.
Want to get updated on any future drone projects like this right to your email inbox? You can opt in for notifications below.
[sibwp_form id=1]
4G Drone Hardware
To upgrade a PiHawk drone kit into a 4G drone, you’ll need the following items:
- 4x standoffs with M2.5 threads and 6mm length
- USB-C cable (to power RPI4)
- Heat shrink
- Soldering iron
- Solder
- Helping hands
- UBEC with 5V output and at least 5A output capacity
- Scotch mounting tape
- Sixfab 4G shield kit
- Sixfab sim card
Video instructions are just way better for following along than text, so I recommend following the video mentioned above starting at 3:36
Essentially, there are two steps you’ll need to take. Firstly, you’ll need to solder your high current capacity UBEC to the power distribution board. This will let you step down the voltage to 5V for the raspberry pi. Then you’ll need to solder the USB-C cable to the UBEC output. The UBEC I use in the video has a current capacity of 8A, which is crucial because it will be powering both the raspberry pi and the shield on top of it that enables 4G on your drone.
Next, you’ll need to attach the sixfab shield to the top of the raspberry pi. If you have an already built PiHawk drone kit, it will be necessary to remove the pixhawk and mount, and then reinstall on top of the sixfab shield. Again, I recommend checking out the video to see how this is done.
Sixfab 4G Shield

The sixfab 4G shield is an awesome solution for upgrading your drone for BVLOS 4G drone control. It simply rests on top of the raspberry pi and can provide it with internet via the cellular networks. It even has a nice dashboard where you can manage the sim cards. You can even access the pi from the dashboard for a cellular connection to your drone.
The cost of the data plans are going to average $.10/MB. Depending on what type of data you intend to transmit with your 4G drone, the cost of your operation will obviously vary. However, for simple telemetry transmission to a ground control station, the data transmission is minimal.
You will pay for your sim’s data usage through the sixfab dashboard as well.
Controlling Your 4G Drone
Once your drone is 4G connected, there are a ton of ways you can interact with your drone. We’re going to cover two practical methods in this article.
Limitless Telemetry Range With MAVProxy
Normally when your out in the field flying your drone, you’ll connect your ground control station to your drone with 915 MHz or 433 MHz telemetry modules. Then you can get telemetry data into a program like Mission Planner or QGroundControl.
As mentioned in the intro, you can only be so far away from your drone before the telemetry connection drops.
Well, we can actually stream telemetry data with our 4G drone via the cellular networks to our ground control stations.
To really follow along with this, follow along with the video starting at 32:33
We’ll need to set up port forwarding on our home router. In the video, I used port 5000, so everytime my router received traffic on port 5000 it would be sent to the computer I was using as my ground control station.
This telemetry connection needs to be initiated from your drone using mavproxy. The command would look something like this, using 1.2.3.4 as a placeholder IP address for your home router.
mavproxy.py –master /dev/ttyACM0 –out 1.2.3.4:5000
Again, where 5000 is the port we configured port forwarding with on our router. The /dev/ttyACM0 is going to initiate a connection with the pixhawk using the USB /dev/ttyACM0 device on the raspberry pi.
If everything was set up correctly, your GCS computer should now be receiving telemetry data via the cellular network. All you need to do is connect with UDP. In Mission Planner, just click connect with UDP and enter in the port 5000 and voila! You now have a connection to your 4G drone and can even control it from the user interface.

Using crontab, you could configure this command to start automatically on your raspberry pi at every bootup.
Limitless SSH Range Into Your 4G Drone
The first method involved limitless telemetry range, but what if you needed command line level access to your 4G drone’s computer?
This method will solve that issue, giving you the ability to SSH into 4G drone right from your computer.
There is a big hurdle here, and that is we don’t know the IP address of the 4G drone. We will know the IP address of our home router.
With these two factors combined, we can set up a reverse ssh tunnel. What’s that you ask? Well it goes like this.
From the raspberry pi, you initiate an SSH tunnel with your computer. Then through that already established connection, you can SSH into the 4G drone from your computer without having to know the drone’s IP address.
With SSH keys and a crontab configured to start the reverse SSH tunnel automatically, you’ll be able to SSH into your 4G drone without even needing access to the pi.
For an extremely detailed overview of how to configure this, watch the video starting at 49:31
4G Drone Mission For BVLOS Control
We put this all to the test with BVLOS control of a drone that was 70 miles away. This distance could have easily been in the thousands, but it just felt like a long drive.
Watch the video starting at 1:15:31 to see 4G drone control from 70 miles away. Essentially, an ssh connection is established from 70 miles away, and then from the command line a python dronekit script is initiated.
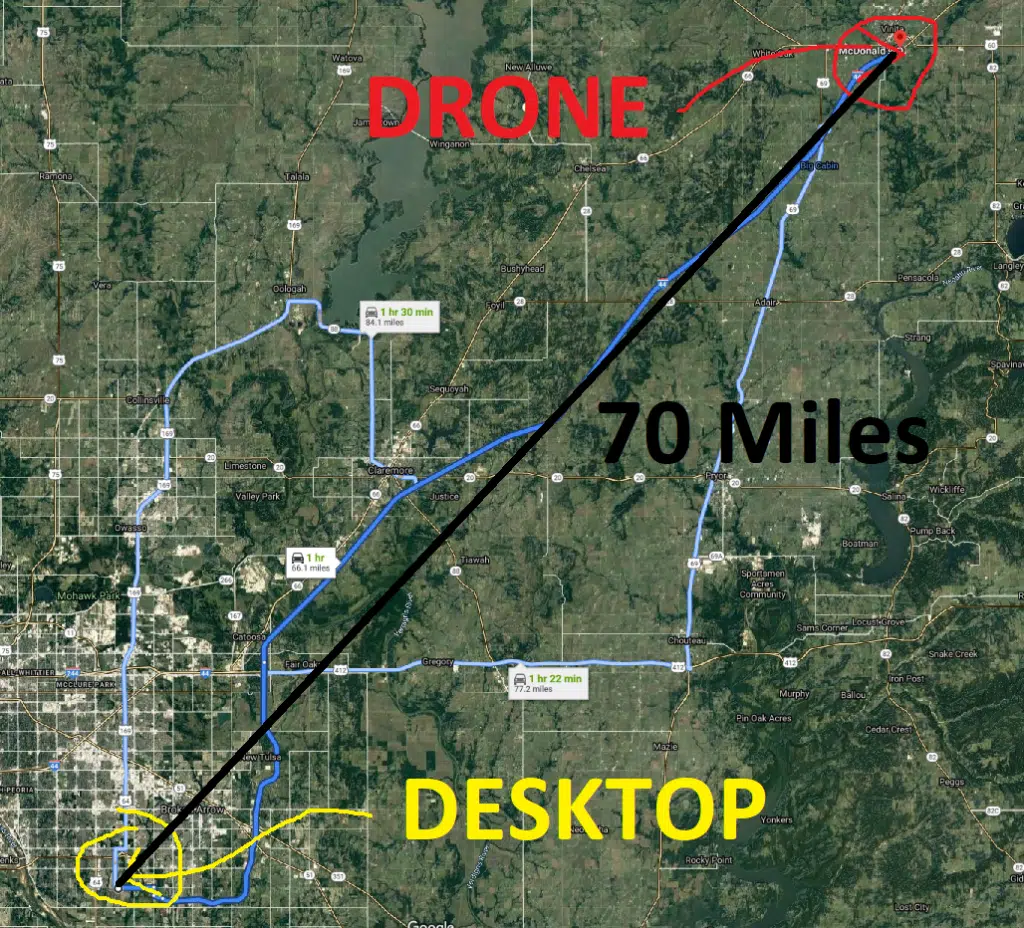
Note to the FAA, this wasn’t a true BVLOS mission. I was with the drone and remoted into my 70 miles away desktop.
The Importance of 4G Control For BVLOS Drone Missions
The drone industry is likely in its infancy, with most applications requiring manual pilots.
In the future, autonomous drones will drive massive amounts of growth for new applications. When you have an autonomous drone, it isn’t bound to distance, so conventional telemetry and control methods are useless.
4G drones will be a crucial element of the autonomous drone infrastructure, allowing for truly remote control, telemetry and access.
The technology for BVLOS drone control is already here. If you’re interested in developing the future of drone applications, getting familiar with 4G drone control is a must.
What are you waiting for!? Take action before some other punk in Silicon Valley takes your idea 🙂