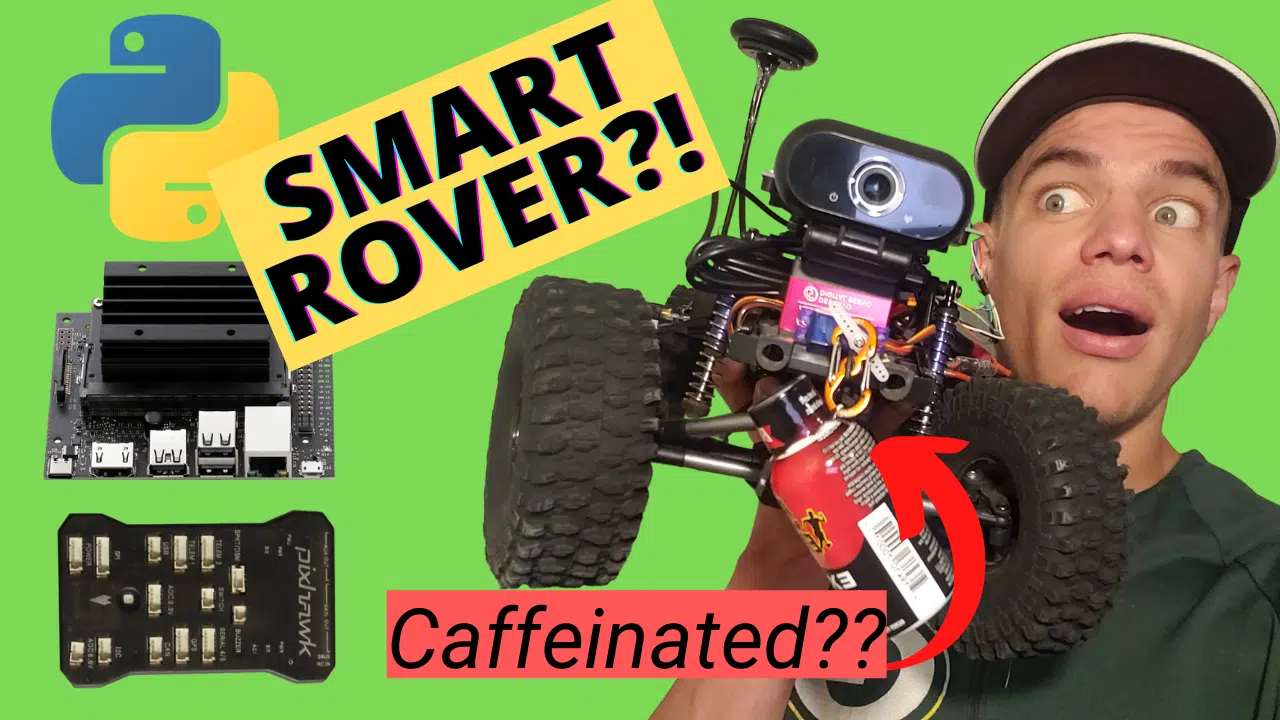
How To Make A Smart UGV | An ArduRover Guide (2021)
Since you’re here, I’m guessing you have interest in building or obtaining your own smart UGV (unmanned ground vehicle). Perhaps you have a particular project you want to bring into the world, if only you could figure out how to make your own smart rover!
Well look no more. This blog post will detail how you can create an autonomous rc car. The smart ugv you’ll make in this post will be powered by ArduRover running on the popular Pixhawk flight controller.
To really create the ultimate smart rover, this build will have the Jetson Nano as a companion computer. With this powerful pixhawk and jetson nano combo, the hardware won’t be your project limitation. It will be your (corny alert) imagination. I warned you.
No really, this ugv will be capable of:
- Artificial Intelligence
- Machine Learning
- OpenCV / Computer Vision
- Python Control
- Autonomous Missions
- Voice Control (Hey, Jarvis!)
- A ton more
So whether you’re a college student looking for the perfect starting point, or an ambitious entrepreneur looking to test an idea, buckle up! You finally skimmed through all the trash and partial resources on the internet to find the one resource you need.
If you want to build along with this post, you can check out our Jetson Nano Rover Kits here. All the parts come pre-selected, pre-soldered, and even pre-flashed with the firmware and example python control scripts.
This blog will cover the following subjects:
- Rover Vehicle Types
- High Level Theory
- Build and Tune the Rover
- Manually Drive the Rover
- Set up the Jetson Nano Companion Computer
- Control the Rover With Python Scripting
- Capstone Mission: Autonomous Rover Delivery
This will be a long post based on this comprehensive smart rover guide. I’ll be referencing this video throughout this post.
One note about this post- I will be using ugv and rover interchangeably. This is to please the google gods, don’t let it confuse you!
How To Select The Right Rover Vehicle Type
If you are new to the UGV world, this can be a very daunting subject. There are hundreds, if not thousands of rover choices out there.
How the heck do you select the right rover, and then how in the double heck do you know to select the corresponding parts? Different vehicle types have different hardware requirements.
There are two main classes of rover drivetrains you can go with: skid-steering and conventional steering.
Conventional steering ugvs drive exactly like your car. There is a central motor that propels the car forward or backward. This is the most common type of drivetrain found in rc cars.
The other class of rover is skid-steering. These types of vehicles have a motor powering each wheel (or just the back two) and are capable of the ‘zero turn’.
A zero turn means the vehicle can essentially spin in a circle without moving forward. This is something conventional steering rovers aren’t capable of.
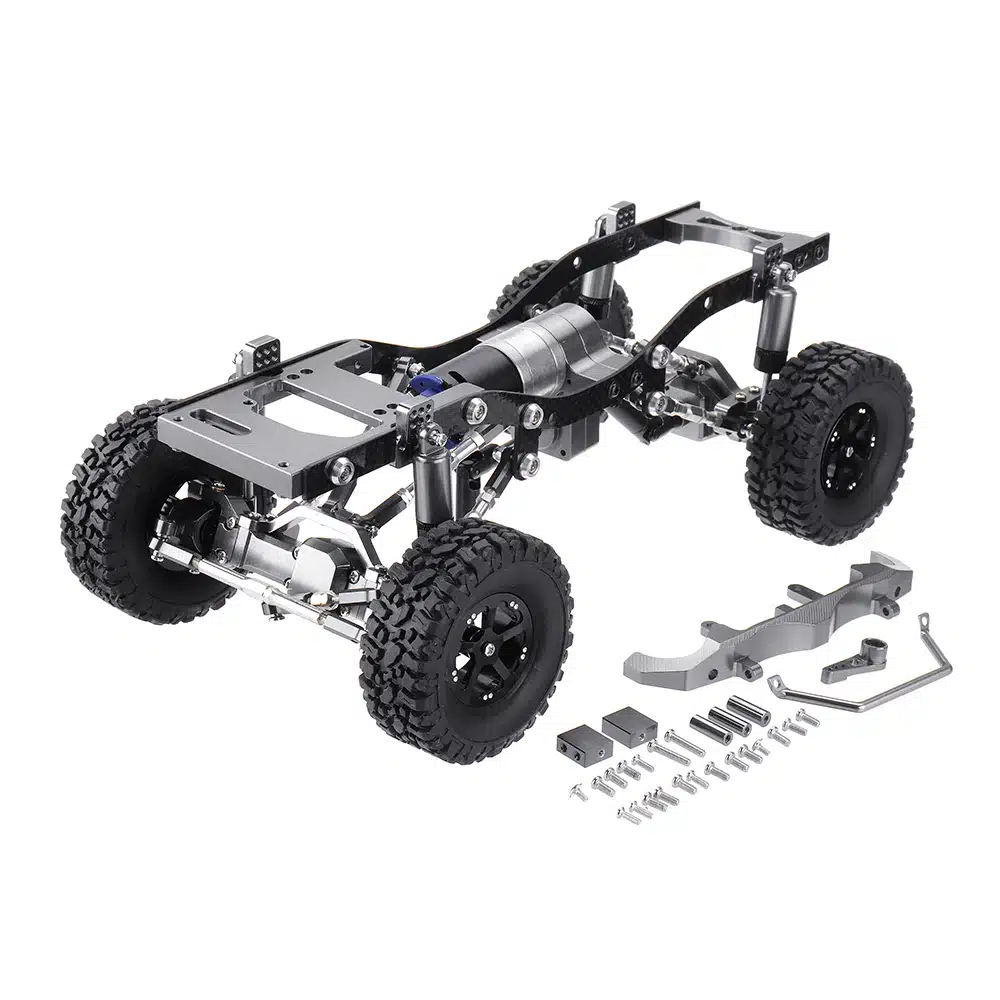
There are even deeper levels of classes we could examine, but I recommend going with a 1/10th conventional steering crawler.
There is a lot to unpack there. What is a crawler you ask? This is a conventional steering rc car that is great for pretty much any type of terrain: rocks, sand, snow, bumpy grass, pavement etc.
We are going with this vehicle to maximize terrain flexibility. Conventional RC cars or ‘ai car’ dev kits you may find on amazon can really only function indoors and on extremely smooth terrain, and we don’t want to limit our ugv’s terrain capability.
I mean come on, what if we want to build an autonomous lawn mower?
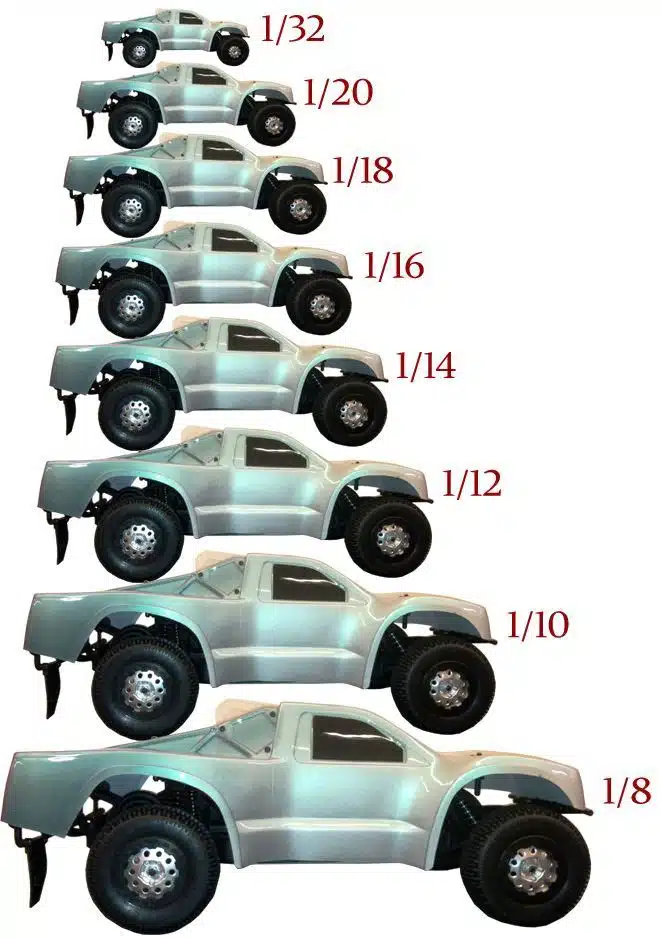
What is the 1/10th scale? RC cars report size based on it’s relative size to a normal sized vehicle. So a 1/32nd scale care is TINY, while a 1/8th scale RC car is pretty big.
We are going with the 1/10th size so that there is plenty of room to mount all of the hardware we need to transform an RC car into a smart ugv.
That being said, you can still follow along with this guide with any vehicle type and size.
Okay, we have our vehicle now. How do we make it autonomous?
Difference Between RC Car and Smart Rover
So what’s the difference between an rc car and a smart ugv? It’s a good question, and the two will even look very similar! Admittedly, the lines are a bit blurry and there is some overlap.
Let’s define both.
RC Car:
- Entirely dependent on human control
- No special sensors
- No special state estimation
An RC car simply detects an RC controller command and translates that directly into a movement command.
Smart Rover:
- An RC Car can become a Smart Rover
- Has a central flight controller to fuse sensors and provide position estimation
- Autonomously drive itself and correct driving errors from sensor integration
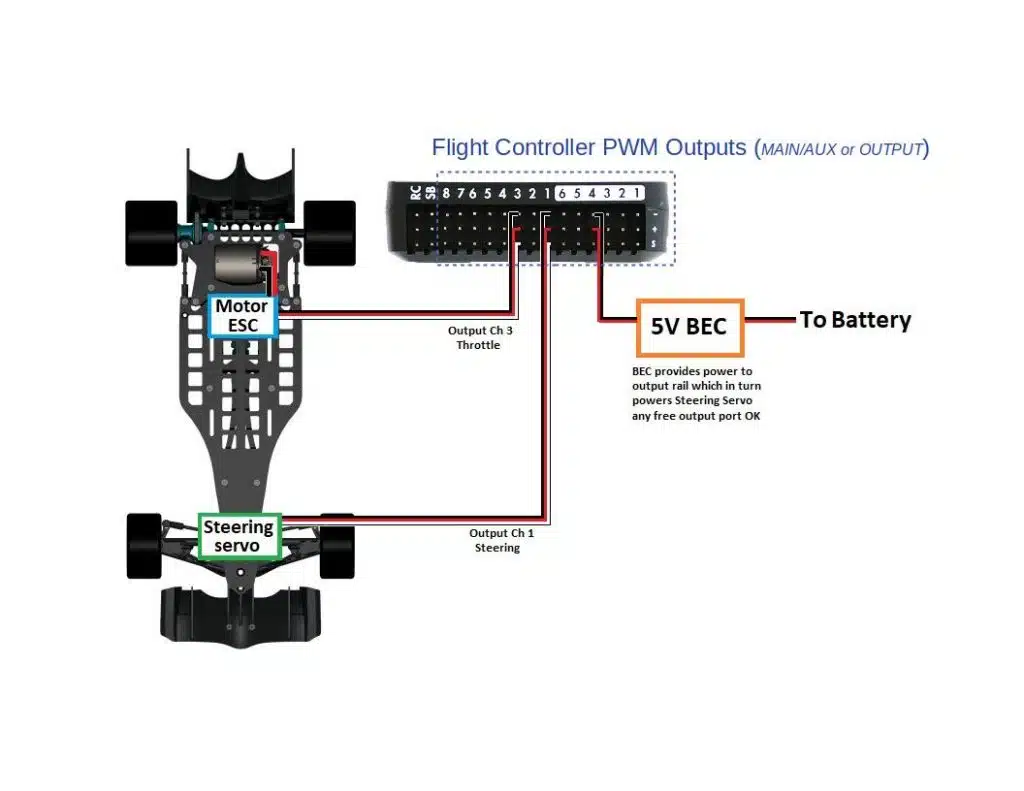
On an RC car, the RC receiver commands are wired directly to the motors. There is no computation, position estimation, autonomous functionality or error correction.
For a UGV, the drive commands are taken from the flight controller, not a human.
Not to blur the lines, but you can control a Smart Rover with human RC commands while it is in manual driving mode. It’s like Will Smith’s car in i Robot. The car can drive autonomously but you can override it if desired.
Smart Rovers are essentially canvases for your autonomous projects. You can layer in any amount of complexity or functionality you want for your project.
Want to control your smart ugv with AI? Perfect, there is a python API which allows you to control your rover based on certain AI inputs.
Want to command your smart ugv to autonomously drive towards an aruco marker using computer vision? That is possible on a smart ugv.
So what is this fancy firmware that provides autonomous drive functionality?
ArduRover
You have probably heard of ArduPilot. It is an open source project to further the development of autonomous vehicles. Emphasis on vehicles.
ArduPilot works on multirotors, planes, boats, rovers and other vehicles.
It is easily flashable onto popular flight controllers like the Pixhawk. So in seconds, you can obtain all the features of the very complex firmware.
You may be tempted to write your own firmware for your special robot, I wouldn’t recommend that. The ArduPilot code base has millions of lines of code for sensor integration, position estimation, sensor drivers, control modes, safety features and a ton more. It’s just not a productive use of time to reinvent the wheel.
ArduPilot for the rover and boat vehicle types is called ArduRover, and is what we will be using on this build.
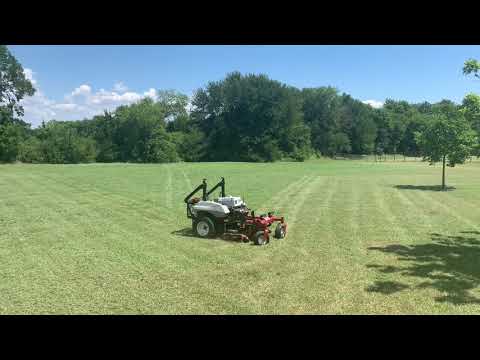
ArduRover and the Pixhawk alone are capable of autonomous driving.
Want proof? Here is an autonomous lawn mower running ArduRover.
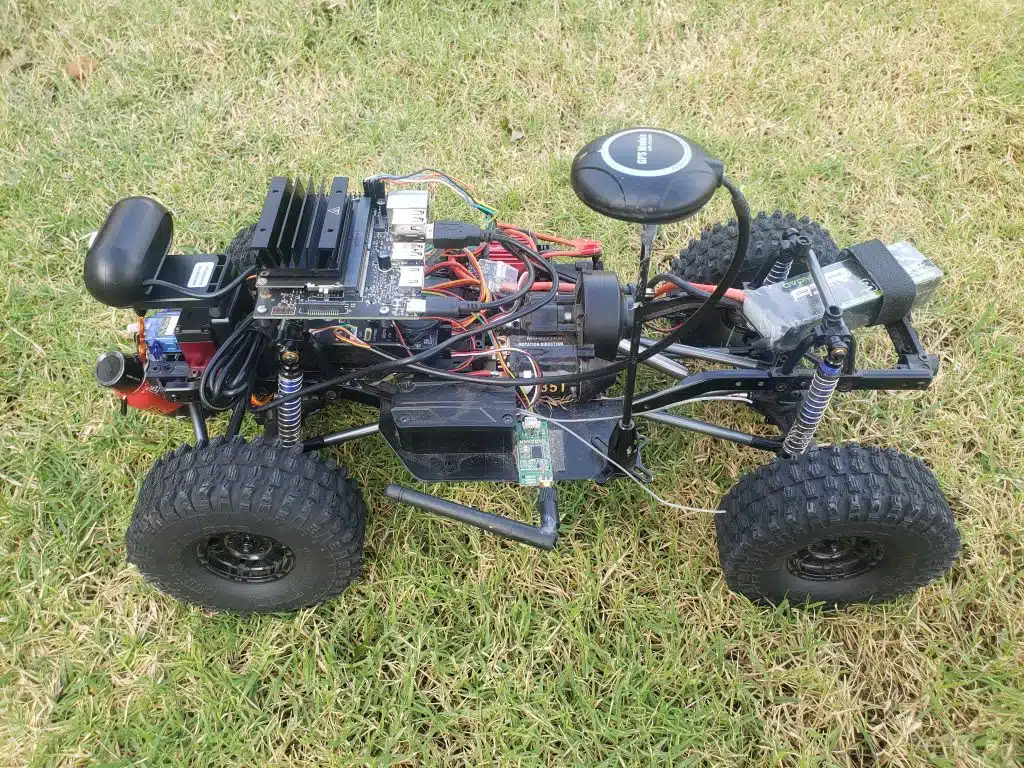
Building the Smart Rover Hardware
ArduRover and the pixhawk alone are capable of autonomou
For our RC crawler build, we need to following:
- 1/10th RC crawler
- Brushed Motor ESC
- Steering Servo
- GPS
- Telemetry
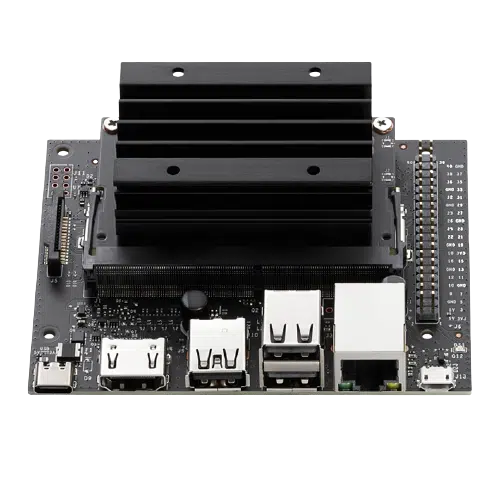
- Flight Controller
- Companion Computer
- Companion Computer Mount
- Companion Computer to Flight Controller Connector
- Power Module
- 5V 3A UBEC with USB-C line
- Lipo Battery
- Lipo Battery Straps
- RC Receiver and transmitter
- Webcam (optional)
- Delivery Servo (optional)
- Miscellaneous parts
As you can see, there is a ton that goes into a smart rover build.
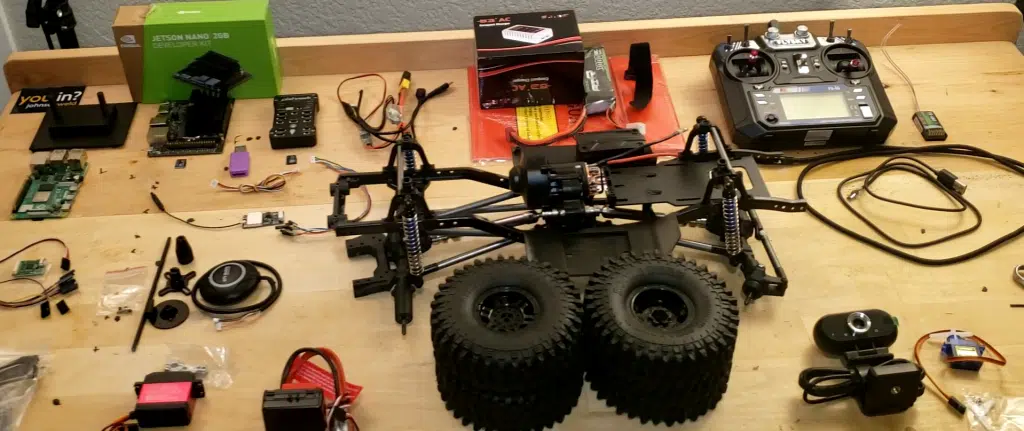
Check out the video referenced above at 13:01 to learn how to build all these parts.
After Building The Smart UGV
You may be able to manually drive the smart rover after putting the hardware together, but there is still some work to be.
- Tie Rod Length For Straight Driving
- Getting the tie rod length correct will produce a straight driving rover
- Motor Spin Direction Test
- Throttling forward may spin the motors backwards. This DEFINITELY needs to be addressed.
- Motor Dead Zone Test
- Throttling up on your RC controller won’t move the motors right away. The amount of throttle needed before the motors respond needs to be identified
- RC Mapping
- In ArduRover, throttle is normally channel 3. On a rover, you’ll want that to be on an RC stick that auto-adjusts to the middle. This is most likely channel 2.
- Throttle Rate and Turn Rate Tuning
- VERY important to get right for your rover. Performing proper tuning is crucial for your autonomous rover drive modes
If you got your Jetson Nano Smart Rover Kit from the Drone Dojo, much of this will already be done for you.
After these steps are done, you’ll be ready to take your smart rover for a drive and explore some of what ArduRover has to offer. The core control modes are HOLD, MANUAL, GUIDED, AUTO, RTL.
Check out the video at 55:09 to get a more in depth look at these config steps and at 1:11:34 to see the various control modes.
Jetson Nano Setup On Smart Rover
To this point, we will have a 5th grade level autonomous rover. It can drive in some autonomous modes, but it has not yet reached its full potential.
To really unleash to power of your smart rover, you’ll need to install a companion computer. For this build, we will be using the Jetson Nano to put our smart rover on steroids.
It will communicate with the Pixhawk, running ArduRover, via a UART connection. Once this UART connection is established, so much is possible.
Check out the video at 1:25:04 to learn how to set up the Jetson Nano with all the dependencies.
Again, Jetson Nano Rover Kit purchasers won’t have to worry about this step. Your Jetson Nano will be pre-flashed with everything you need.
Controlling Your Smart Jetson Nano Rover With Python
Once the dependencies are set up and your UART bridge between the companion computer and flight controller is established, it’s time for python level control of your rover!
If you want to get a deeper sense of the ArduPilot stack and how python fits into controlling various vehicles, I highly recommend checking out this post on drone programming. It is from the perspective of drones, but is extremely helpful for learning about this software environment.
So let’s get into the python scripting.
The python scripts will run on the jetson nano and will send commands to the pixhawk, which then propels the vehicle.
There are two types of movement we can use in python scripting: location based movement and velocity based movement.
In location based movement, we simply specify a waypoint for the smart rover to drive to, and the rover drives to said waypoint.
In velocity based movement, there is no intended destination or waypoint, we simply want to vehicle to drive in a certain direction at a certain speed.
Check out the video at 1:42:41 to see location based and velocity based smart rover control with python.
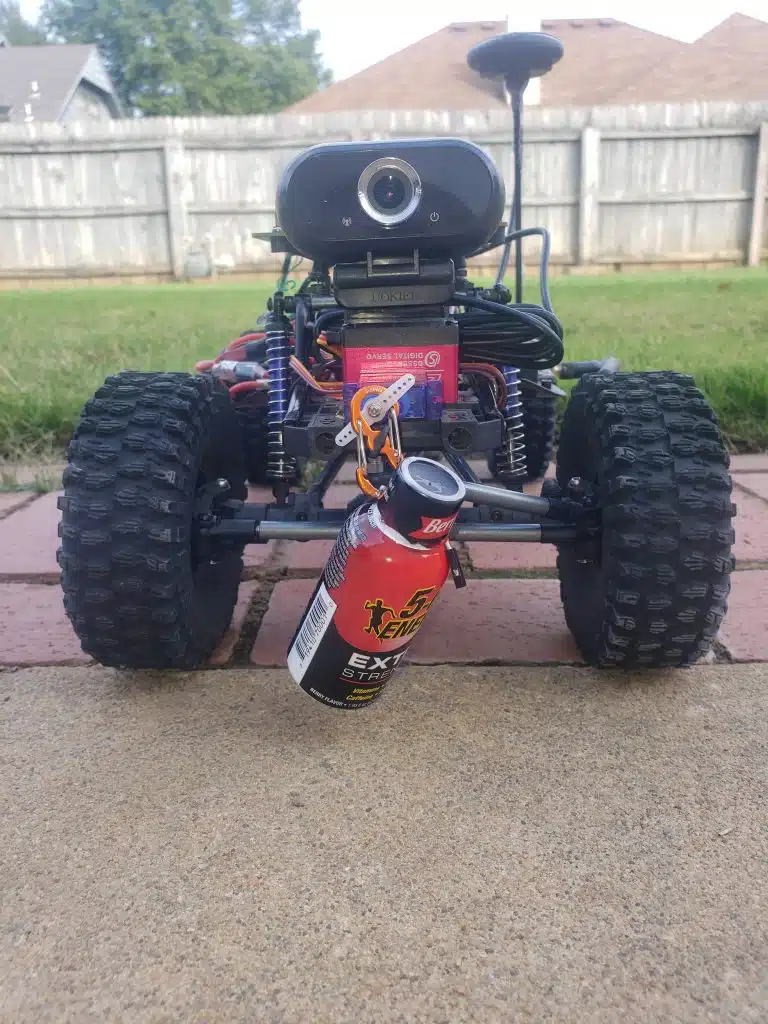
Autonomous Rover Delivery
At this point, you have the tools to control your smart ugv! All the colors are on your palette, now it’s time to paint.
Want to perform an AI mission? You can vary your velocity commands to your rover based off some AI logic. Want your smart rover to drive on the sidewalk? Use openCV to influence the velocity commands you send to the pixhawk.
There are so many possibilities.
Here is one possibility, autonomous rover delivery. Check out the video at 2:05:03 to see that mission.
What’s Next? Build Your Own Smart Rover
If you’re new to this rover space and want to act on an idea or project you have, or just want to explore a new and exciting technology that is in its infancy, I highly recommend looking at one of our Jetson Nano Rover Kits.
All the parts are pre-selected and compatible.
The firmware is pre-flashed for the Jetson Nano and Pixhawk.
The turn rate and steer rate tuning is done for you.
Example python scripts are already on your Jetson Nano.
You’ll have access to myself for any questions.
We’ll also be using this same smart ugv for future projects to really explore its capabilities.
If this smart rover platform and saved work is of interest to you, you can reserve yours now!