


Can’t Connect to MAVProxy or Dronekit? Do This To Resolve Your Connection Issues
The following guide is a comprehensive checklist of things to do when you have connection issues between your flight controller and your companion computer on an ArduPilot drone. If you are experiencing errors like “link timeout” “link 1 down” “no link”, then read this guide. These issues can be seen when attempting to start MAVProxy, or even running a python dronekit script.
Whether in simulation (eg, SITL) or a real drone, those words are never good. You’ve
gone through all the work – built a cool drone, wired it up and programmed a companion
computer. Then the big finale is… a fizzle. Argh!!
“Link 1 down” is generated from mavproxy.py in the check_link_status()
function. It checks for a good communication link before progressing.

In a real drone, it’s clear your Raspberry Pi or Navio2 is not talking with the flight
controller, and often you don’t know what to do. It can be a complex issue, as there are
a number of reasons how this might occur, so a systematic approach might be best to
help with troubleshooting the most common problems. These suggestions should be
applicable for most configurations.
Typically, a good approach is to first just review what you did leading up to the problem.
List out the steps you used and start with the easy stuff first. For example, the
mavproxy or SITL statement might be incorrect. Next, evaluate if you should re-install
software, or as a last resort replace hardware.
Below we explore and troubleshoot some the more common reasons in the real drone
as well as some from simulation.
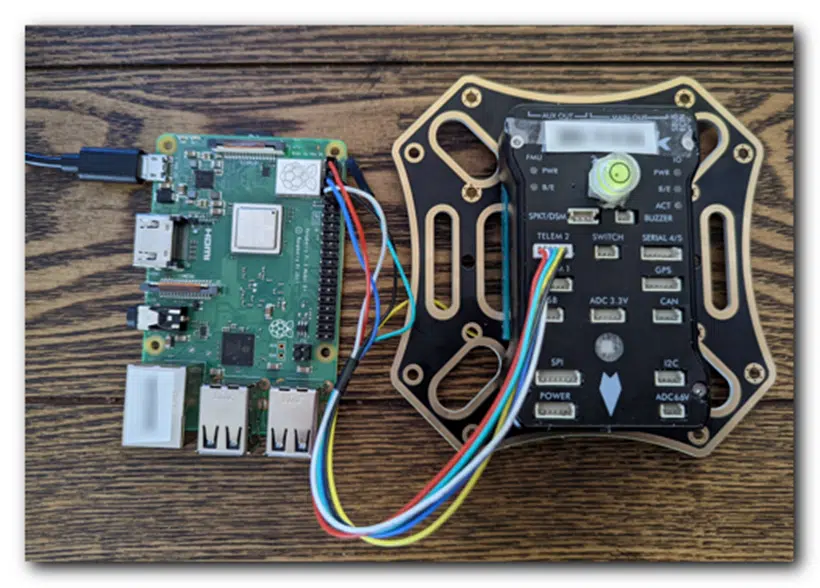
Common Reason #1: The Tx and Rx signal wires are connected wrong.
To remedy this, simply connect the Tx of the flight controller (FC) serial port/UART TELEM2
connector 1 to the Rx of the Raspberry Pi, and the Rx of the FC to the Tx of the
Raspberry Pi. Rx to Tx and Tx to Rx. If you’re uncertain as to the proper wiring of your
flight controller, search on “(name of flight controller) pinout”. Ensure the wires are
securely connected as are the +5V and ground wires.
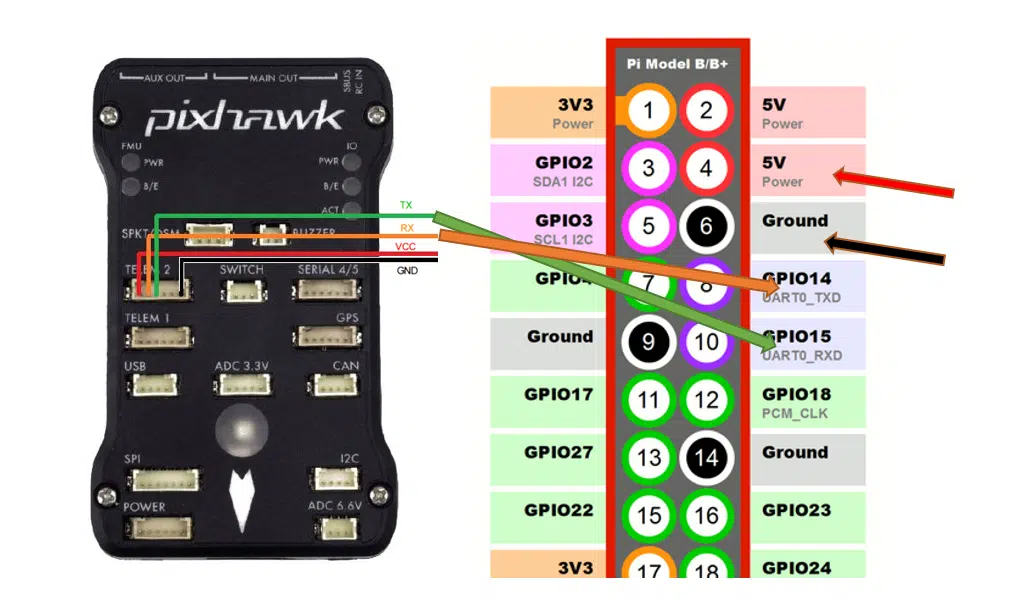
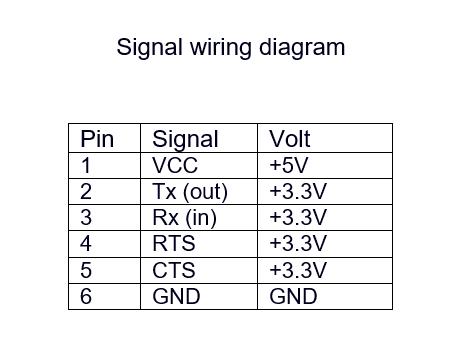
Flight controller serial port/UART TELEM pinout
1 TELEM1, TELEM2, SERIAL 4/5 should work in Pixhawk.
Common Reason #2: The companion software is not correctly loaded.
There are various ways to build your environment. But be sure you are not missing any of the
steps and the directories are correct. Write them down and check them off. If you
suspect the build is wrong, it might be best to just start over. Better safe than sorry!
Two important steps that might be missed include:
sudo usermod -a -G dialout $USER
sudo apt remove modemmanager
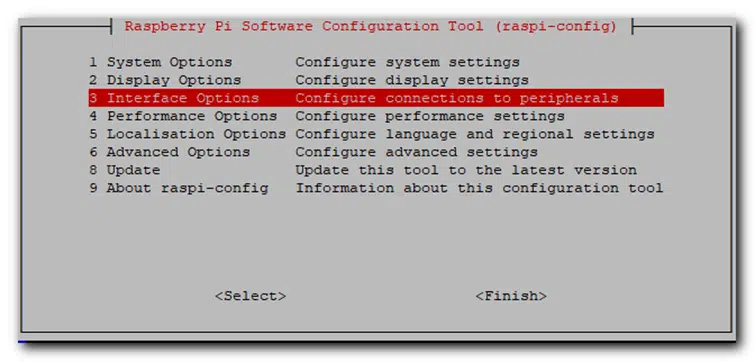
Common Reason #4: The serial interface is not enabled.
Another often overlooked step is to forget to enable the serial port interface in the
Raspberry Pi. Use these steps to fix it in linux:sudo raspi-config
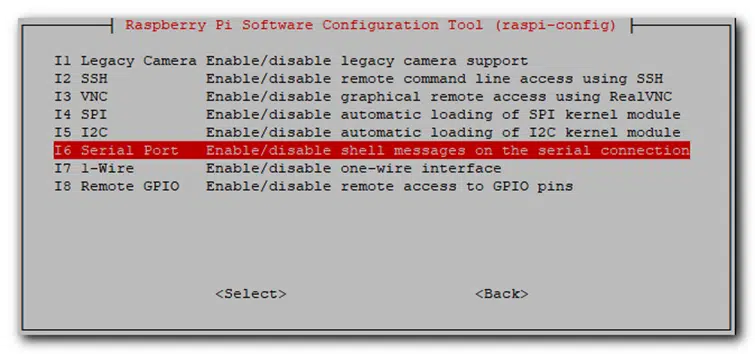
Would you like a login shell to be accessible over serial? >> NO
Would you like the serial port hardware to be enabled? >> YES
Common Reason #4: Forgot to configure the bt overlay.
Ensure the following two lines
are added to the bottom of the /boot/config.txt file:enable_uart=1 (Step #3 should do this.)
dtoverlay=disable-bt
Failure to perform reasons #3 and #4 above will not open the serial port to the drone
flight controller, resulting in a ‘link 1 down’ error.
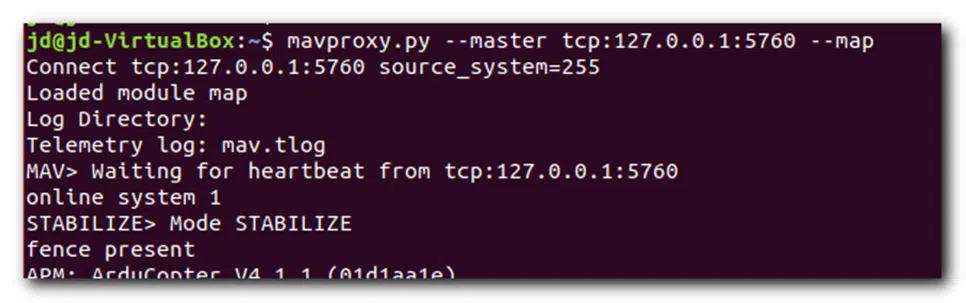
Common Reason #5: Incorrect Mavproxy statement.
Look at the following two similar statements used in the SITL. One works whereas the other doesn’t. It is easy to sometimes type it in wrong or forget the proper structure.
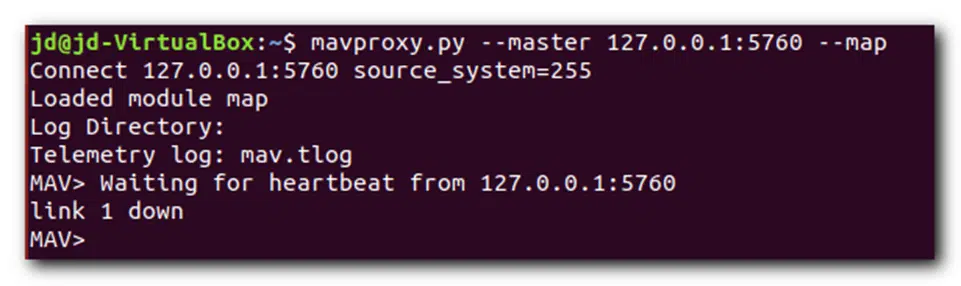
Or you used the local serial connection when you meant to use a network connection,
or vice-versa.
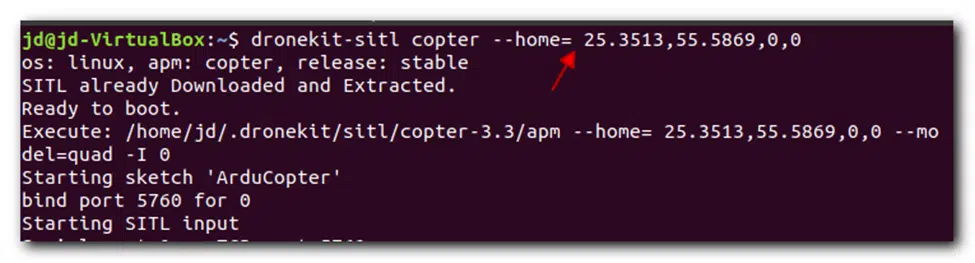
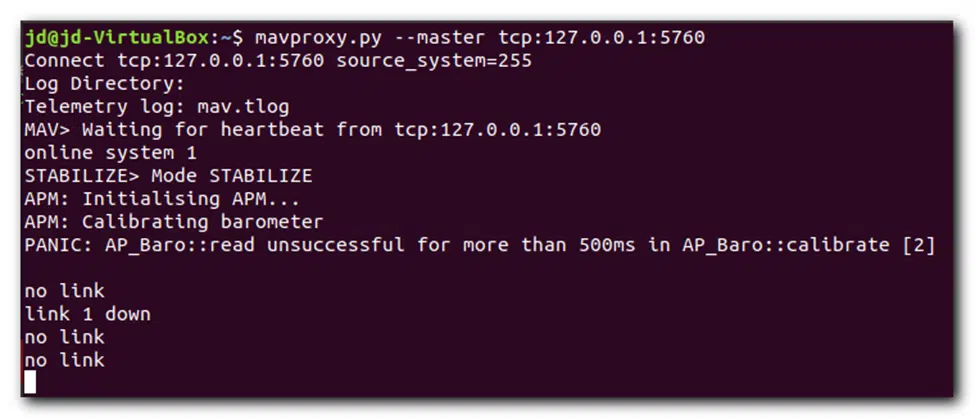
In this SITL example, notice the space after “home= “ which led to an improper parsing
of the coordinate information, resulting in no link when mavproxy was invoked.
Common Reason #6: Incorrect Mavproxy baud rate.
This is probably one of the more common and easiest connection failures to fix. The baud rate should be in agreement with the flight controller setting made in the ground control station, eg, Mission Planner.
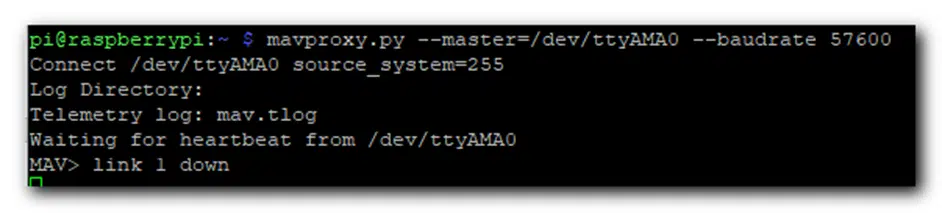
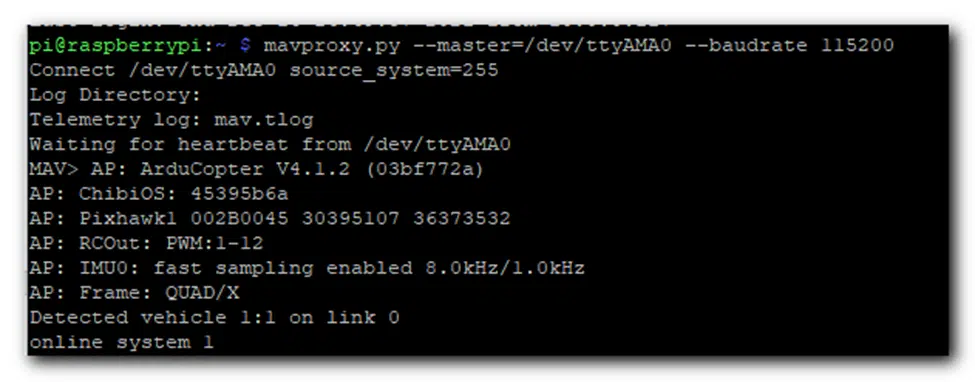
An easy change of baud rates from 57600 to 115200 in the above example got it going.
Sometimes a connection is made but you see ‘garbage characters’, indicating the baud
rate should be changed. At high baud rates (> 500,000), nearby EMI can sometimes
disrupt the link.
Common Reason #7: Failure to set up the flight controller protocol.
In addition to setting the correct baud rate, ensure the flight controller parameters are in agreement with the serial port. These are set in the Mission Planner CONFIG section.SERIALx_PROTOCOL
SERIALx_BAUD
Common Reason #8: Failure to use the correct communication port.
Ensure the correct UART port 2 is used, for example:
TELEM2=/dev/ttyAMA0
or =/dev/ttyACM0 (if you are using a USB connection).
If using the NAVIO2, ensure this is correctly set in /etc/default/arducopter,
followed by the commandssudo systemctl daemon-reload
sudo systemctl restart arducopter

Other Possible Reasons
Hardware issues might arise early but also after crashes. These include:
- Dysfunctional or dirty Raspberry Pi GPIO pin.
- Loose GPIO connection
- Consider using glue or tape to hold the dupont connectors in place
- Loose or bad telemetry cable
- Try re-inserting or replacing.
- Dysfunctional flight controller or UART pin
GPIO pins can be checked using pigpio.
Troubleshooting can be a process of replacing components and by elimination can
pinpoint a faulty device.
Some of the fixes are easier than others, so start with the easy ones first. As a last
resort sometimes a flight controller needs to be replaced or the software re-installed.
But keep at it as perseverance will win the day!
2 Use the ls -l serial* command to list them.
Tip: Try testing first on the bench to ensure a good connection.
References
1 https://ardupilot.org/dev/docs/raspberry-pi-via-mavlink.html
2 https://discuss.ardupilot.org/
3 https://elinux.org/R-Pi_Troubleshooting#Testing
4 https://docs.emlid.com/navio2/ardupilot/installation-and-running/#mavproxy