

DIY RTK GPS Drone Build | A Comprehensive Guide
If you’re on this page, you know that most drones have a regular GPS- but what about an RTK GPS? Typical ready-to-fly RTK GPS drones cost 4 thousand dollars on the lower end, and up to $50,000 on the higher end. With these high costs, one may question why they don’t just build their own diy rtk gps drone.
Well, that is exactly what this post is about. If you need a breakdown on how RTK GPS works, here is a breakdown. Remember, in an RTK GPS setup, you need not only the GPS on your drone, but also a base station that is flinging error corrections to your drone in real time. That is all covered in the RTK GPS post above.
All in all, instead of spending thousands of dollars on a RTK drone, you can build one for under one thousand dollars! That is the advantage to being a DIY builder.
Things you will need:
- ArduPilot capable drone
- F9P Ublox carrier board
- Antenna
- Ground Plane
and that’s it! The drone we will be using to convert into an RTK GPS drone in this post is our own Drone Dojo PiHawk Drone Kit, but the advice will work for any DIY style of drone.
Here is a full video on our drone build, followed by written instructions below.
What Can An RTK GPS Drone Do?
The answer to that question is, quite a lot. With a well-tuned RTK drone, you can even say goodbye to special hardware or scripts required for precision landing.
That’s right, you can get +/- 5 inches of landing accuracy within your landing waypoint, every single time with just RTK GPS. So methods like aruco marker computer vision landing, and even IR-lock are no longer required with RTK GPS.
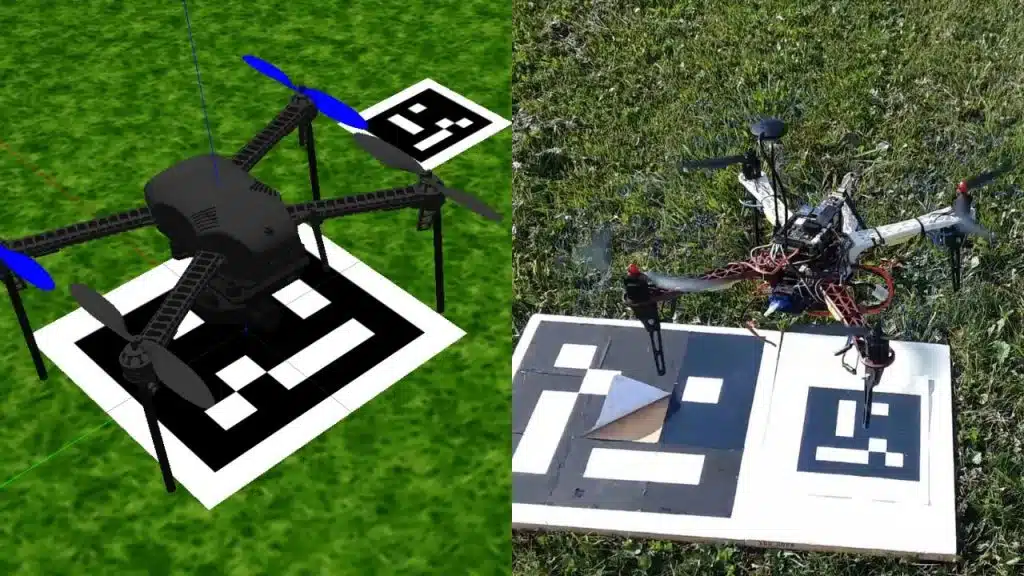
That’s how powerful the technology is.
ArduPilot or PX4 Capable Drone
To build a DIY RTK drone, you’ll want to stay away from more closed source products from DJI. Why is that? Because they shield a lot of the under-the-hood technology from you, making it more difficult to convert your drone.
So that leaves us with the powerful open source drone platforms like ArduPilot or PX4. Here at the Drone Dojo, we prefer ArduPilot due to its excellence in not only drone vehicle types, but also advanced projects like Rovers, Boats, Quadplanes and a ton more.
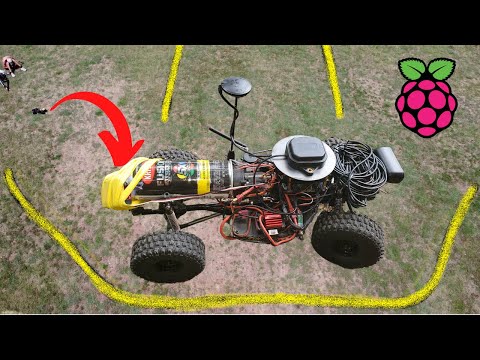
I’ve successfully installed RTK GPS on both drones and rovers. Here’s a video on when I installed RTK GPS on my rover to use precision and spray paint smiley faces autonomously onto grass fields.
The knowledge in this post not only applies to drones, but all other vehicle types as well. As long as you have a flight controller on a vehicle capable of running ArduPilot or PX4, you can check this requirement off your checklist.
We like to use Pixhawks at the Drone Dojo, due to their superior documentation, performance, availability, and price. Even a Pixhawk 2.4.8 will do.
F9P U-blox Carrier Board
To get really good results from your diy rtk gps drone, you’ll want to get really specific on the type of GPS board you use.
U-blox is the standard in GPS technology. They more than likely supply the chip behind every GPS module in the autonomous vehicle space.
However, not all U-blox GPS modules are created equal.
If you want to get inch level accuracy with your diy drone, stay away from the U-blox GPS modules that have an M8N chip on them.
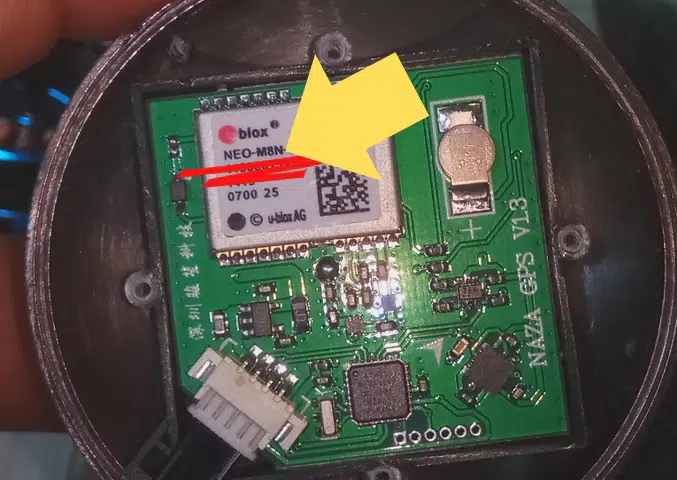
While the M8N U-blox chip is technically capable of achieving RTK, it is far more difficult to achieve. And even if you do manage to get the coveted GPS status of RTK fixed, it may be fleeting.
M8N modules are well known to bounce more frequently in and out of RTK fixed and RTK float. This can be the difference between 1 inch accuracy and 36 inch accuracy.
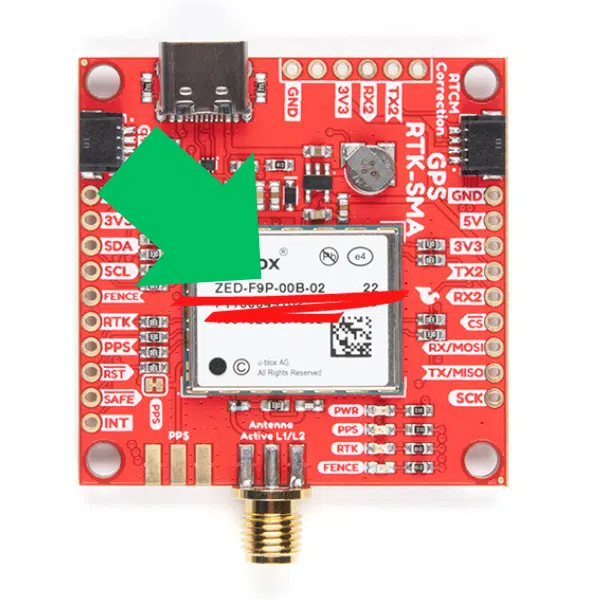
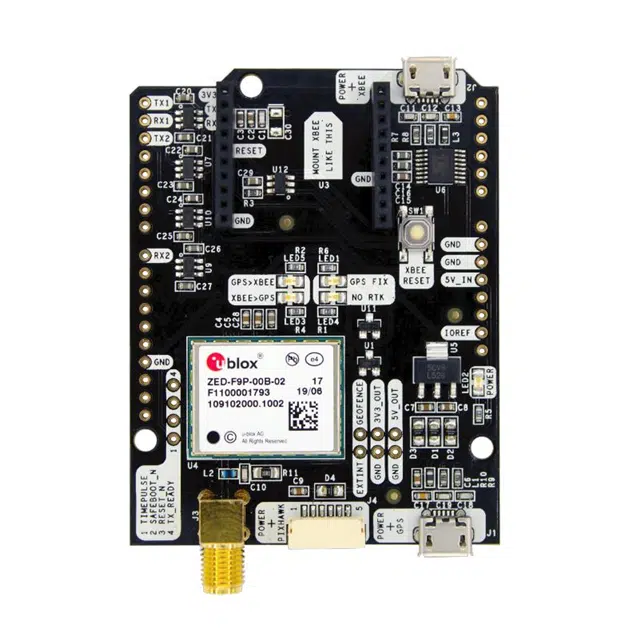
For this reason, we highly recommend using GPS carrier boards that are equipped with the F9P U-blox chip. While these modules are a bit more expensive, they will get you the inch level accurate results that you crave.
Expect to budget around $200 dollars for a carrier board with the F9P U-blox chip. Here are some of my favorite examples.
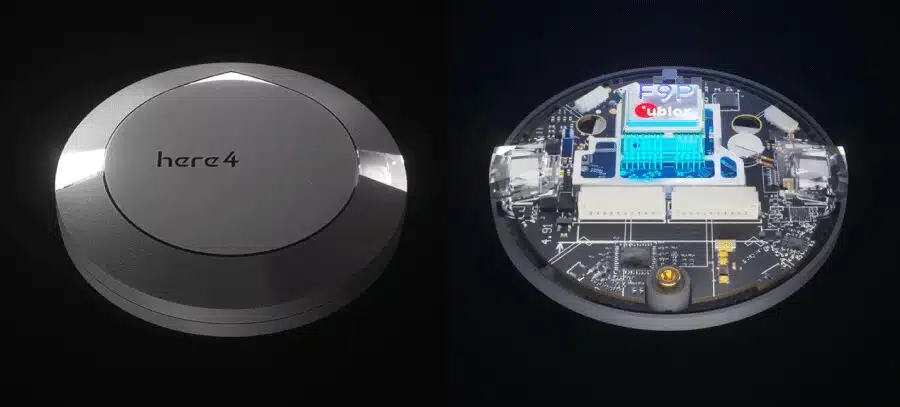
I have used all of these with great success. One advantage to the Here4 is that it has a built-in antenna, while the other carrier boards require an external antenna.
On top of that, if you get a Here4 Blue, you’ll also get Remote ID built right into the module. So you not only make your drone FAA compliant, you also get a kickass RTK GPS.
RTK GPS Antenna
If you are going with anything but a Here4, as of this moment, you will be required to purchase an antenna along with your F9P U-blox GPS.
Both SparkFun and ArduSimple link to supported GPS modules. Here are some pairings that I found to work on those boards.
For the Sparkfun F9P carrier board, you can use this ultra lightweight antenna that only weighs 78 grams.
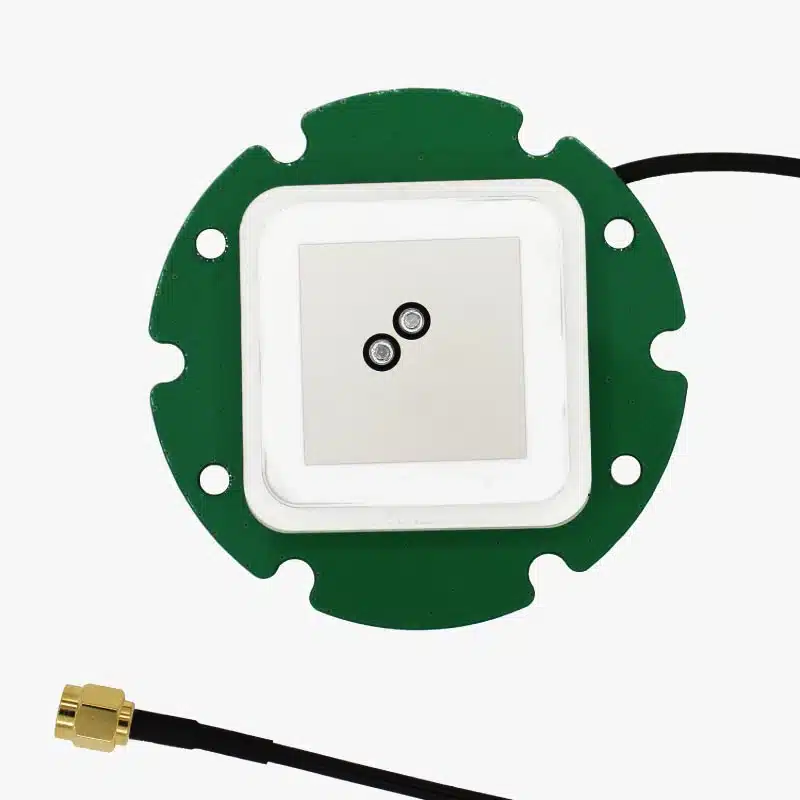
If you’re building a RTK drone, weight is always a concern, so going as lightweight as possible on the antenna is crucial.
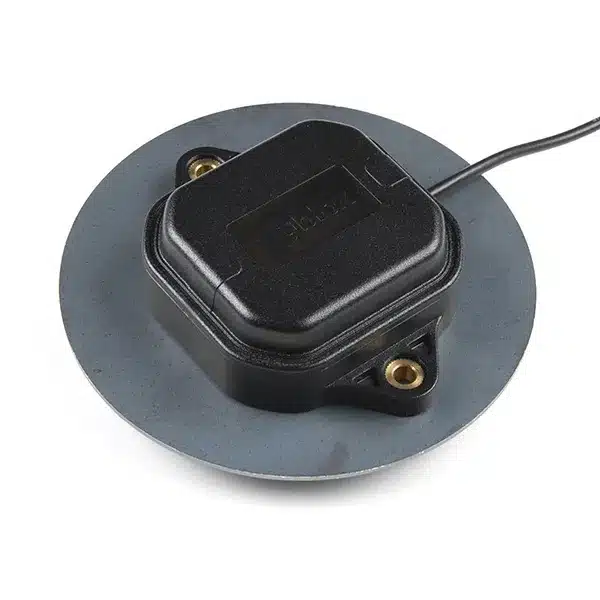
On the other hand, the GPS antenna that commonly pairs with the ArduSimple board weighs in at a whopping 230 grams, so it is mainly recommended for vehicle types like Rovers and Boats where weight is less of a concern.
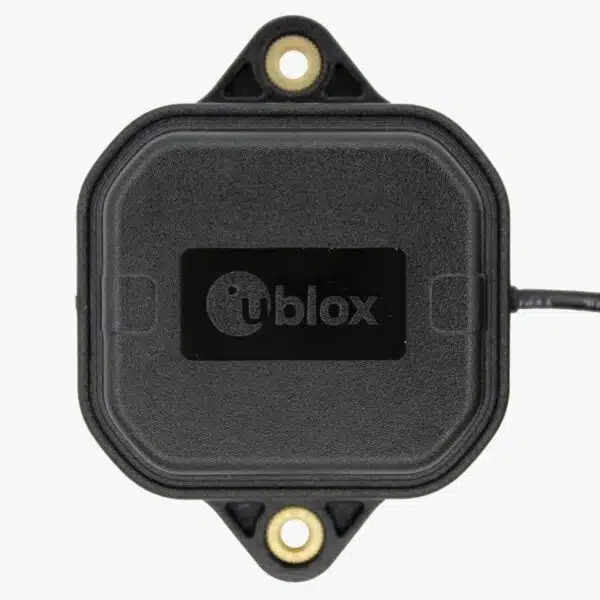
In fact, this is the RTK GPS module I used on my Rover to precision spray paint giant smiley faces into grass fields, and it worked great!
Again for the Here4, you will not need to worry about the antenna, because the Here4 also serves as an antenna.
Ground Plane
Ground planes are one of those things that you may roll your eyes at, thinking things like “hey, I bought this GPS- it should just work dangit!”
Well, unfortunately this isn’t the case. While you may sporadically get RTK fixed results with a F9P carrier board and antenna without a ground plane, you’re going to experience poor results quite often.
This could mean losing one inch precision, and getting farther into the 36 inch precision category.
While this is still better than the 72 inch precision that a normal M8N non-RTK GPS module will provide, you’re here for inch level precision, right!?
So what is a ground plane?
Basically, it is a metallic plane that deflects away GPS signal reflections from satellites. This results in a much cleaner, dependable GPS signal.
Put simply, you’ll spend almost all of your time in RTK fixed with 1 inch precision. GPS reflections can put a real damper on really precise RTK readings.
Now, the antennas we have been talking about are called patch antennas. While they are preferred with more airborne type vehicles due to their light weight, there are other antenna options that do not require a ground plane.
These antennas automatically filter out the bad GPS reflections from the satellites. But they are much heavier. Good keywords for antennas that don’t require a ground plane would be survey grade antennas.
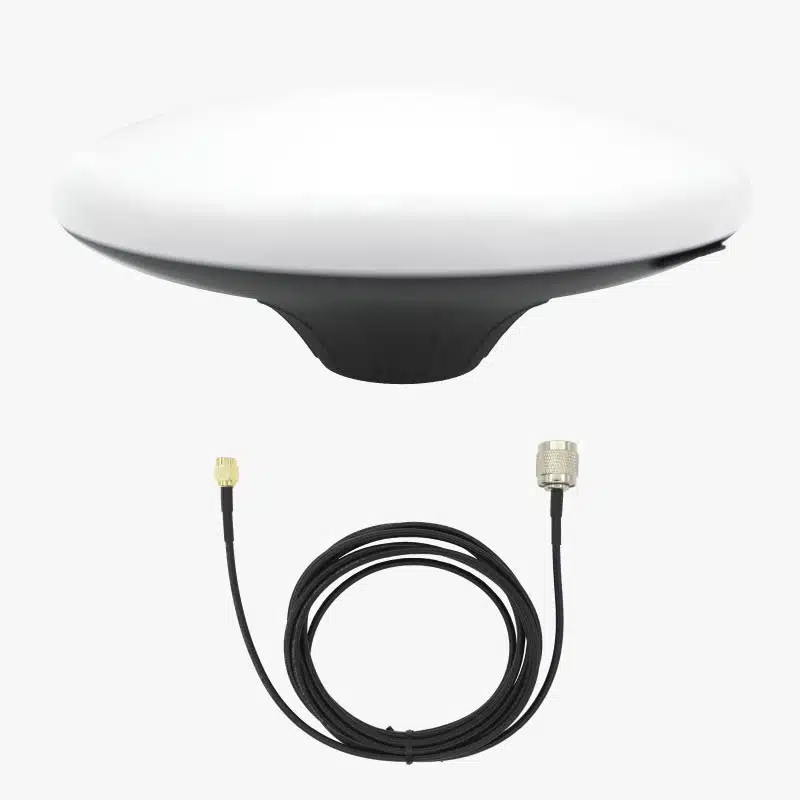
They have a sort of flying saucer type look. Here is an example from ArduSimple, and it comes in at a whopping 390 grams! For some drones, this may make the drone not even flyable after the thrust to weight ratio gets nuked.
It all depends on how big your drone is (aka, thrust).
Here are some examples of lightweight ground planes that I used on my DIY RTK GPS drone builds.
Connecting the GPS to The Flight Controller
Using a flight controller that can run ArduPilot or PX4 makes plugging in your RTK GPS into the flight controller very easy.
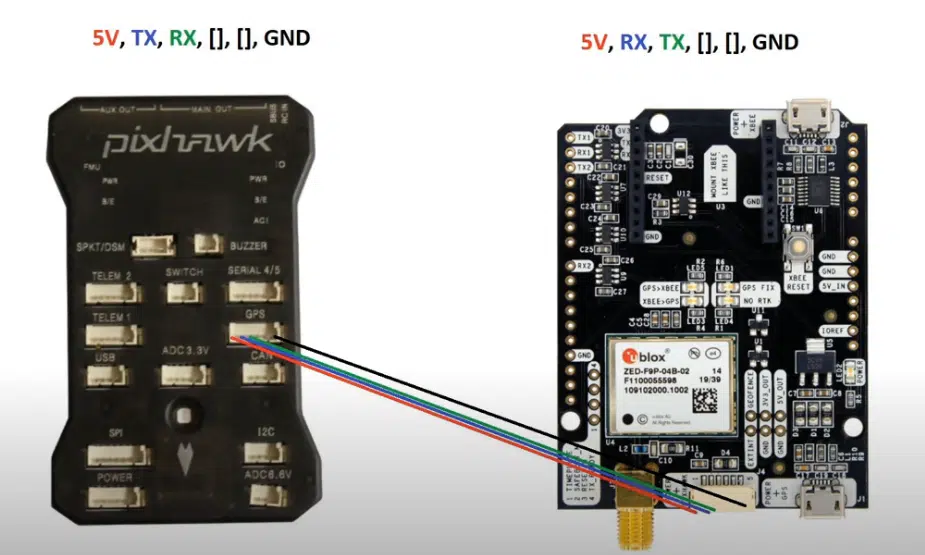
Typically, the connection will be made via a UART connection. Remember in a UART connection, the TX of the GPS goes to RX on the flight controller, and RX of the GPS goes to TX on the flight controller.
For the breakout boards, this connection is typically made with low gauge wire, like 26 awg.
The GPS to flight controller connection is in spirits with the DIY Drone ethos- you’ll have to make it yourself!
But don’t worry, it’s pretty straightforward.
Depending on what type of F9P carrier board you chose, you’ll have different options to make the connection.
For the sparkfun boards, you’ll have to solder some wire from the power, ground, tx and rx pins from the GPS breakout board to a connector that fits with you flight controller.
On the ArduSimple, there is actually a hub that lets you connect right to the board without soldering. The connector type on the ArduSimple is different than the Pixhawk 2.4.8. To make the ArduSimple side of the connector, look for connector kits for the Pixhawk 2.
For the pixhawk 2.4.8, the connectors are the DF-13. You can even get kits that allow you to easily make these connectors on amazon, and they even come pre-crimped!
Here’s an example connector I made for the pixhawk and the ardusmiple at 7:57 in the video below.
On most flight controllers, including the Pixhawk 2.4.8, there is a hub on the board labeled GPS. You guessed it, that is where we will be plugging in the GPS.
It can technically go into other connector hubs on the flight controller board, but you’ll have to appropriately configure the parameters so that the ArduPilot or PX4 firmware knows what port to look for the GPS on.
On the Pixhawk 2.4.8, the connections go like this:
5V, TX, RX, empty, empty, Ground
This is where the DF-13 connector kit from Amazon can come in handy. Just connect 4 wires to these 4 locations on the connector.
Powering Up
Once the connections are made and plugged into the right locations on the flight controller and F9P carrier board, you can just power up and start using the GPS!
In ArduPilot using MissionPlanner, a here’s a good healthcheck to make sure your GPS is being properly recognized by the firmware: In the HUD, make sure the GPS status isn’t “NO GPS”. You can even go into the messages tab in MissionPlanner, and see if the GPS is being recognized. Look for a keyword like “u-blox” in the logs.
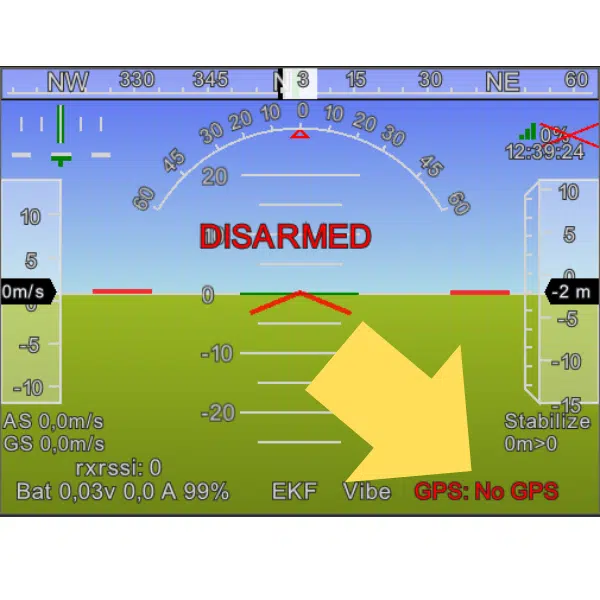
If you see that and there’s not a “NO GPS” reading, congratulations! Your drone is now using your brand new F9P Carrier board’s GPS!
RTK Base Station
Make sure you also have an RTK GPS base station in place. If you don’t do this, your F9P GPS will still get magnificent GPS readings, but they won’t be precise as RTK fixed or float. In the best case scenario, your GPS state will be “3DGPS”.
You have two options for RTK Base Station
- Make your own
- Get RTK GPS over the internet (called NTRIP)
You have a few options for base stations. One, if you have a raspberry pi on board your drone, you can actually receive RTK base station corrections over the internet from a local company providing the service. Many local governments even supply free access to RTK over the internet.
In places where RTK over the internet aren’t supplied, private companies often offer RTK over the internet as a service. Watch out though, their prices can many times go up to as high as $300 per month.
Once you’ve located an RTK over the internet supplier (commonly referred to as NTRIP), connect your drone into MissionPlanner. Then navigate to the RTK GPS section under setup. This is where you will supply your login credentials for your NTRIP supplier.
You can also opt out of NTRIP if you like- but you’ll need to manage your own base station. For the RTK base station, you can use the exact same F9P RTK GPS module you used on your drone. Only this base station module will never move.
You’ll place it in a single place at a known GPS coordinate, then beam over the error corrections to your RTK drone over a telemetry connection.
For more details on how to do that, I go into this topic extensively in this video- where you will learn how to spin up your own RTK Base station.
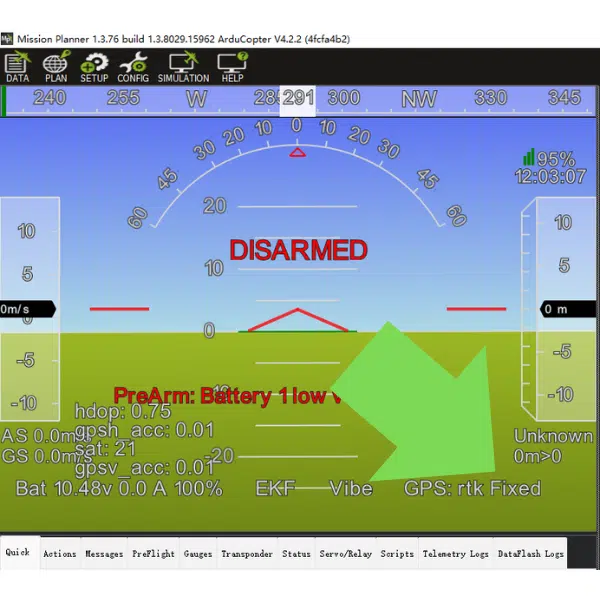
Once you’ve connected your drone to a base station, you should be seeing RTK fixed status in the HUD in MissionPlanner!
Next Steps

If you’d like to take a deep dive into RTK GPS on robots, we have a course dedicated to that. Just sign up for our Blue Belt Membership and you’ll get access to that, in addition to our other 10+ courses and projects.
Happy building!