
Configure RPI to Connect to the Internet
In this section, we are going to configure the raspberry pi to connect to the internet.
You’ll need the following items to complete this section:
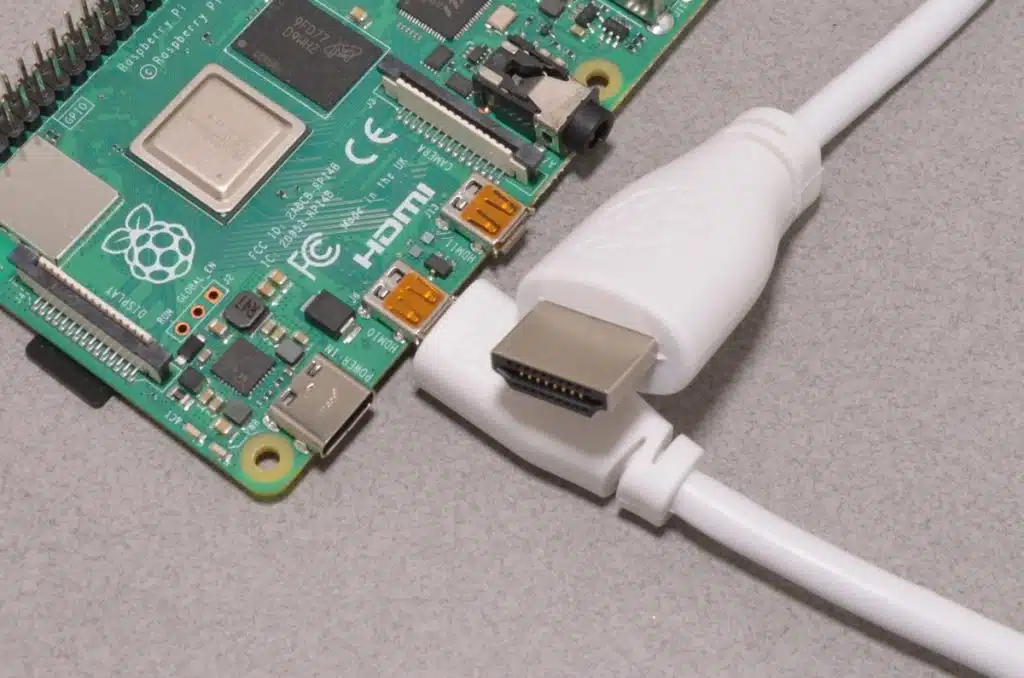
- Micro-HDMI to HDMI cable
- USB keyboard
1. Plug Micro-HDMI cable into the raspberry pi, and the other end into a HDMI monitor
2. Plug USB keyboard into raspberry pi
3. Power on the Raspberry Pi (either through USB-C power with a wall adapter or just plug battery into drone)
4. On the screen that your pi is plugged into with the HDMI cord, you should see the login screen:
Login with password “raspberry”
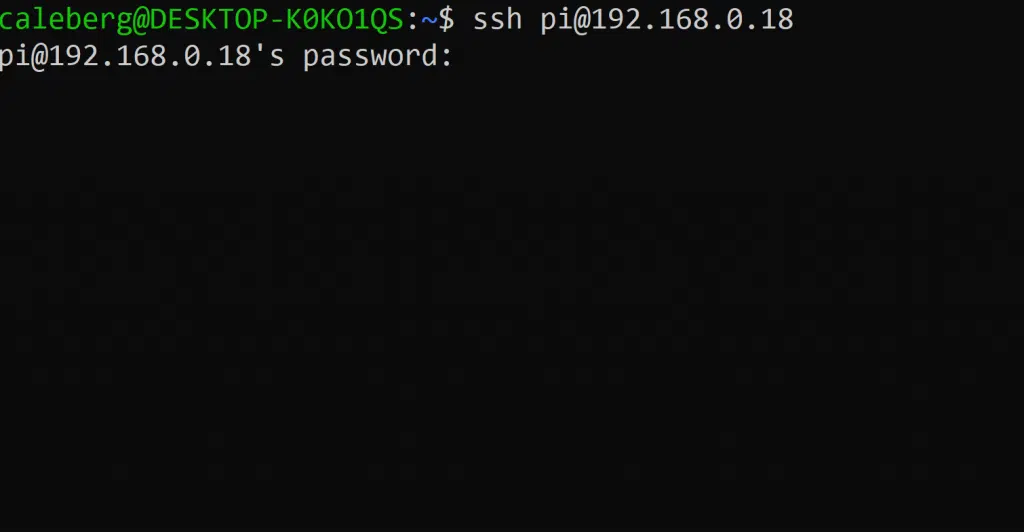
5. Once logged in, type “hostname” and hit enter. Make note of this. This is the unique name of your Pi that we will use to login to later.

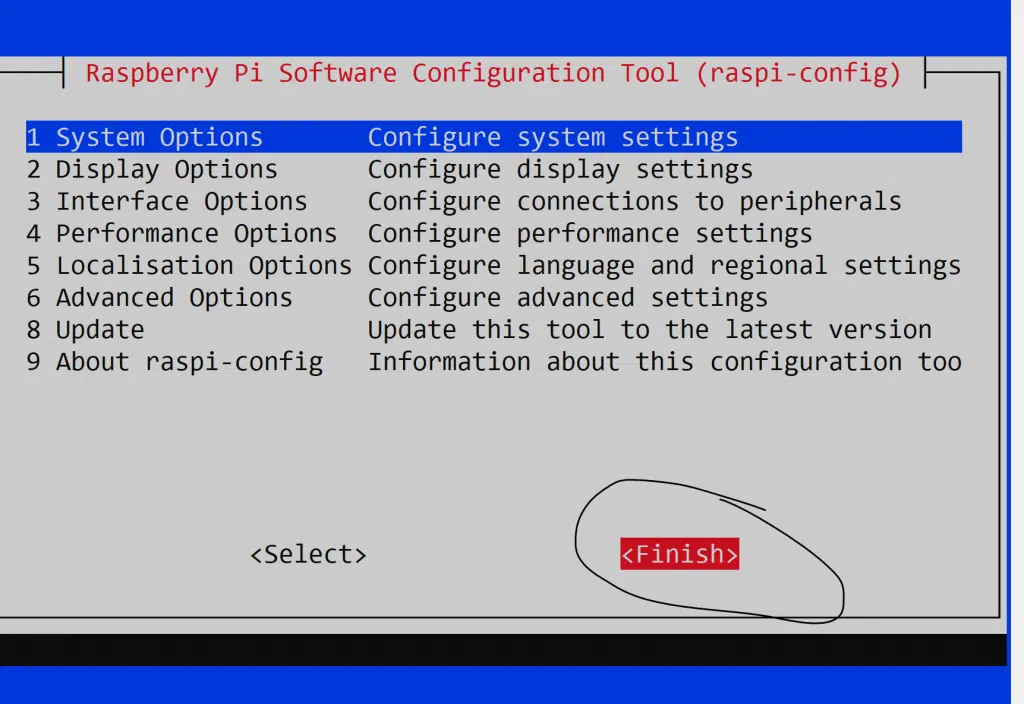
6. Type “sudo raspi-config” and hit enter. You’ll see this screen:
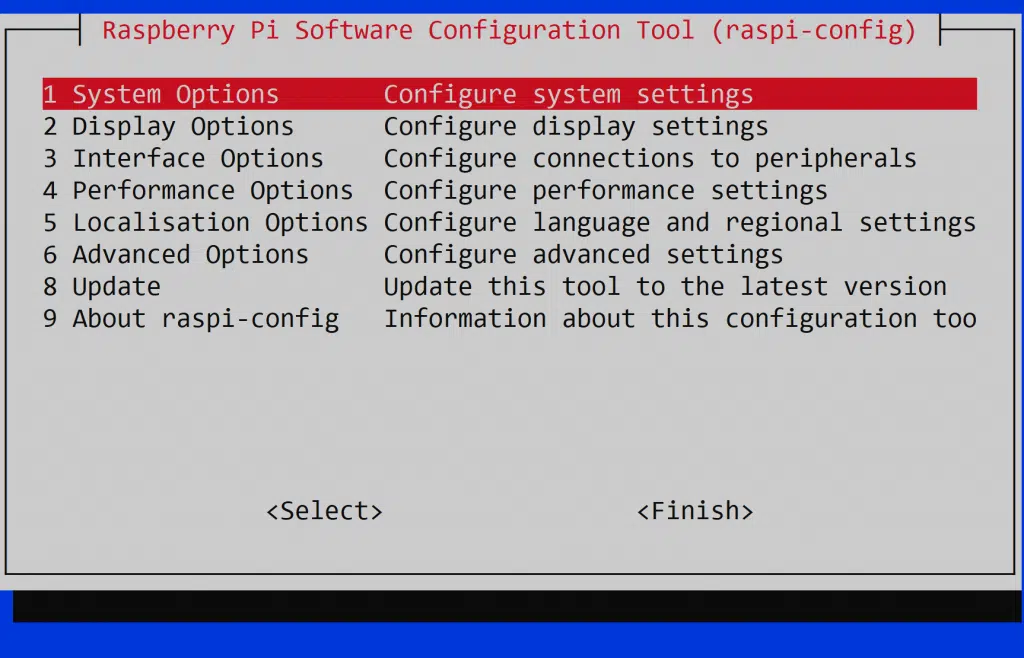
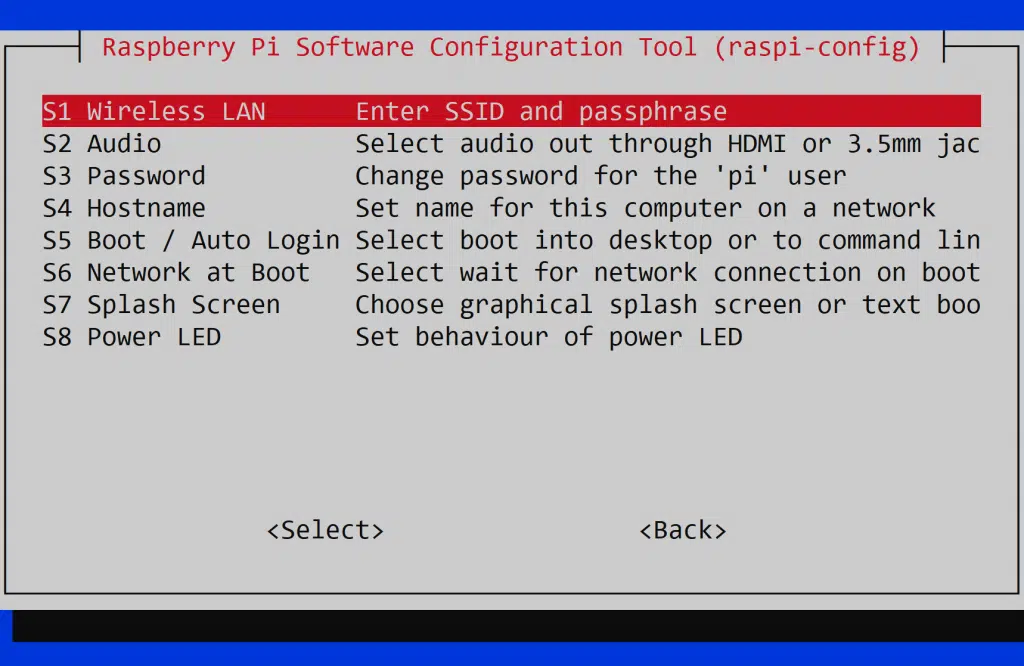
7. Hit enter on “System Options”, then enter again on “Wireless LAN”
8. Enter the name of the WiFi network you want to access. You will need assistance from a camp instructor to know which network to access.
Hit Enter once the SSID is entered.
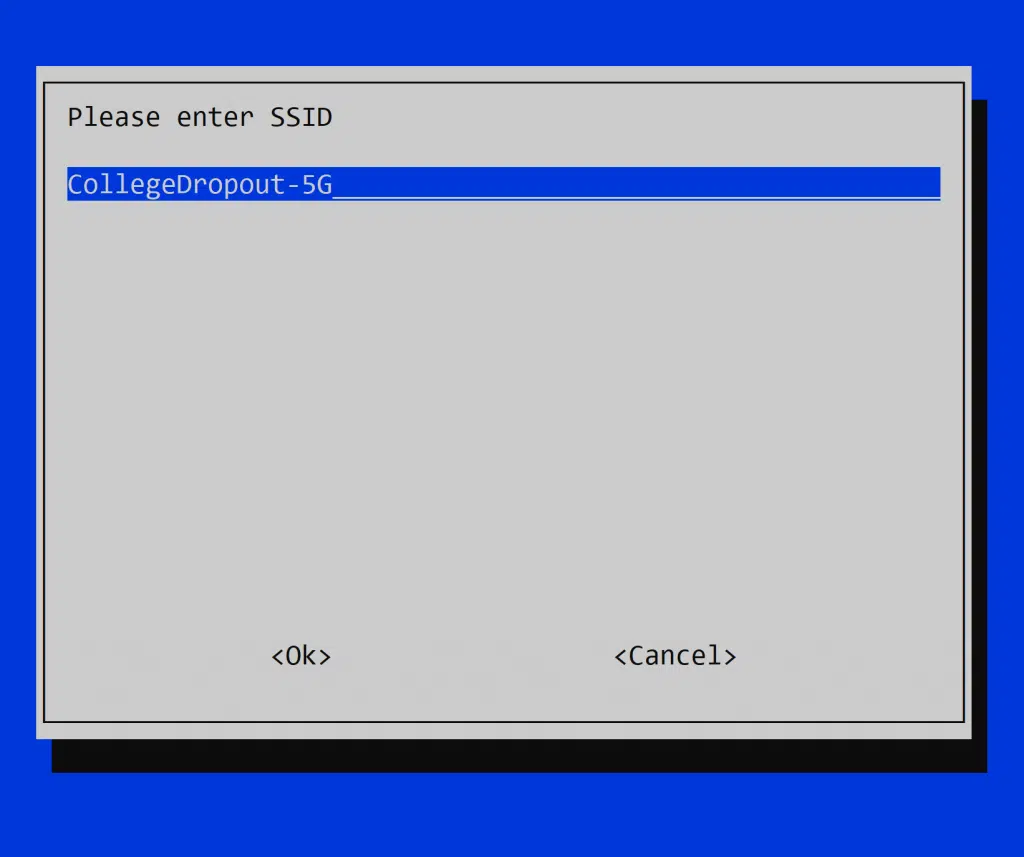
9. Next, enter the password for the wifi. You’ll again need to get this from a camp instructor.
10. Next, arrow over to “FINISH” and hit enter
11. Now type “sudo reboot” to allow the WiFi configuration to activate

12. Now log back in once the Pi has booted back up (allow 1 minute)
13. Type ifconfig and look for wlan0
If you have an IP address by wlan0, then your pi is now on the internet!
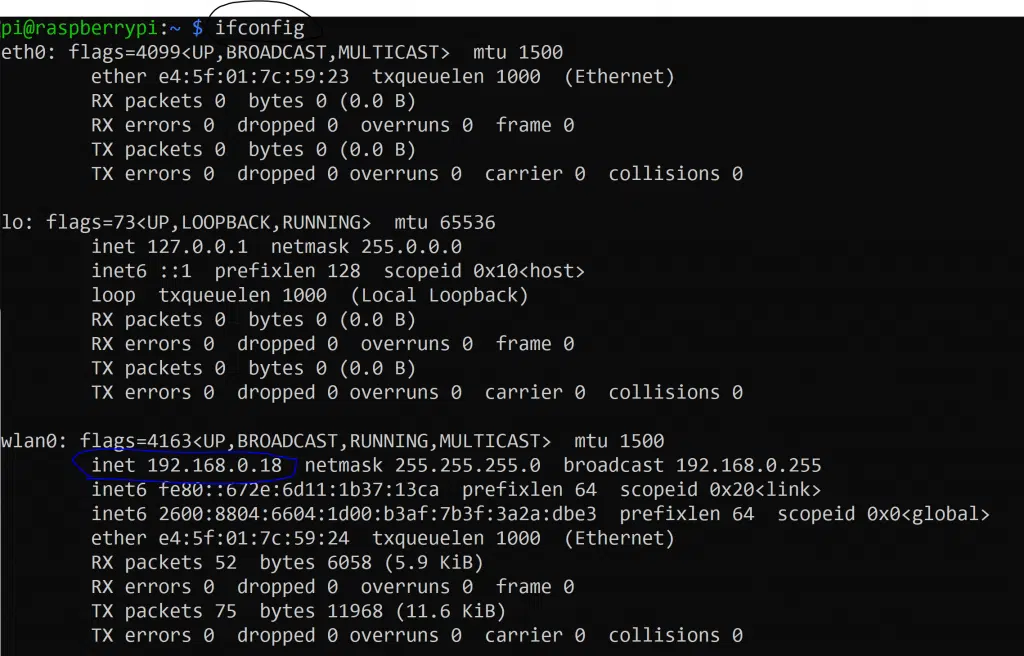
Make note of your IP address! Mine in this example is 192.168.0.18
Write yours down!