
Install Mission Planner and Connect to Drone
In this section we will install MissionPlanner, a helpful interface to communicate with and control the drone
1. Click here to download Mission Planner
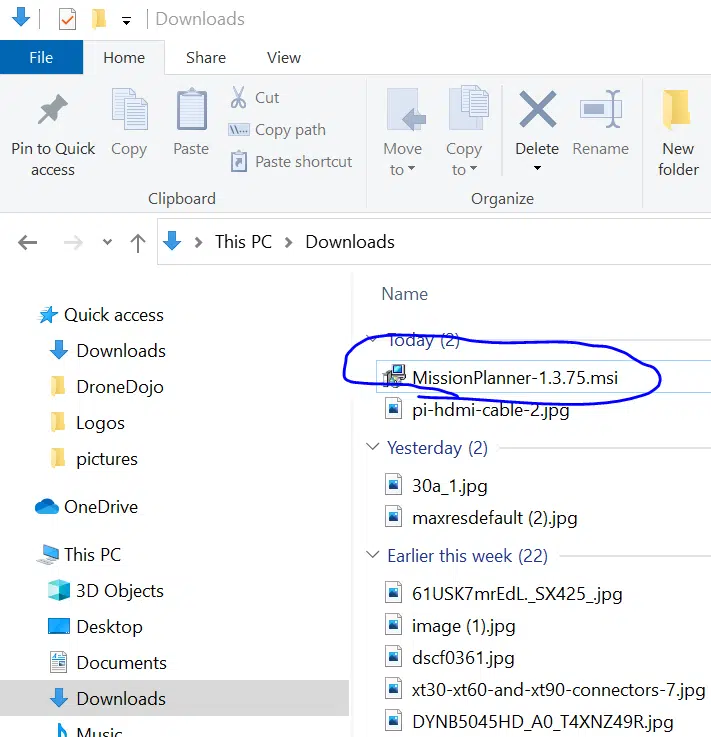
2. Go to the downloads folder, and double click on MissionPlanner-1.3.75.msi
3. Step through all the installation steps
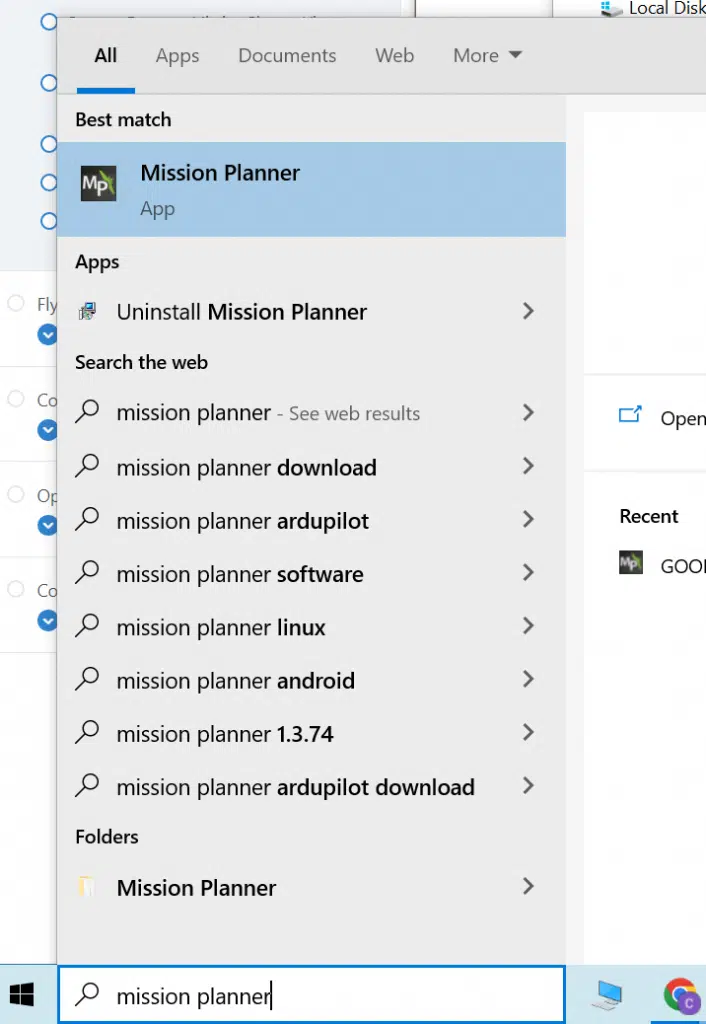
4. Launch mission planner by typing “MissionPlanner” in search bar
5. Plug USB telemetry module into computer
6. Power on the drone. Both telemetry modules should go from a blinking green to a solid green. This signals that the telemetry modules have found each other.
7. In the top right, click COM dropdown and look for “Silicon Labs”. Select that device (your COM number may be different than the COM3 in the picture)
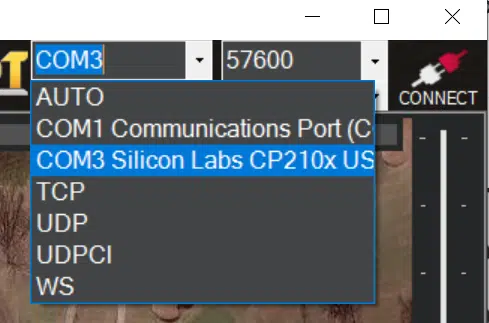
7. Click 57600 for the baud rate
8. Hit connect. If you are successful, you should see data like “Altitude” and “Yaw” changing on the status screen.
You can do a ton of things to the drone with a MissionPlanner telemetry connection, including:
- Controlling the drone
- Calibrating sensors
- Arming motors
- Changing flight modes
- A ton more
We will be exploring these features next!